Views: 1,376
Introduction: Photogrammetry and RealityScan
Photogrammetry refers to the technique where 3D models and measurements are created by scanning or photographing an object. It works by taking multiple photos of an object or scene from different angles, and then using specialized software to analyses those photos and generate a 3D representation of what was photographed.
With photogrammetry being increasingly prevalent in the fields of mapping and 3D modelling, developers started creating mobile-friendly applications to enable people to photograph object and generate 3D modelling via the use of their mobile phones instead of relying on professional cameras and applications that are only available on computers. Applications such as Polycam and 3DF Zephyr are some applications that allow for the simultaneous photographing and 3D model generation of an object on the phone.
RealityScan is another such application that combines scanning and 3D model generation in one. Developed by Capturing Reality, the same company that developed RealityCapture, this application allows the user to capture photos of an object, preview its 3d model mesh, generate a 3d model and then export it to a digital repository for further action using only the application itself.
Steps of using RealityScan app
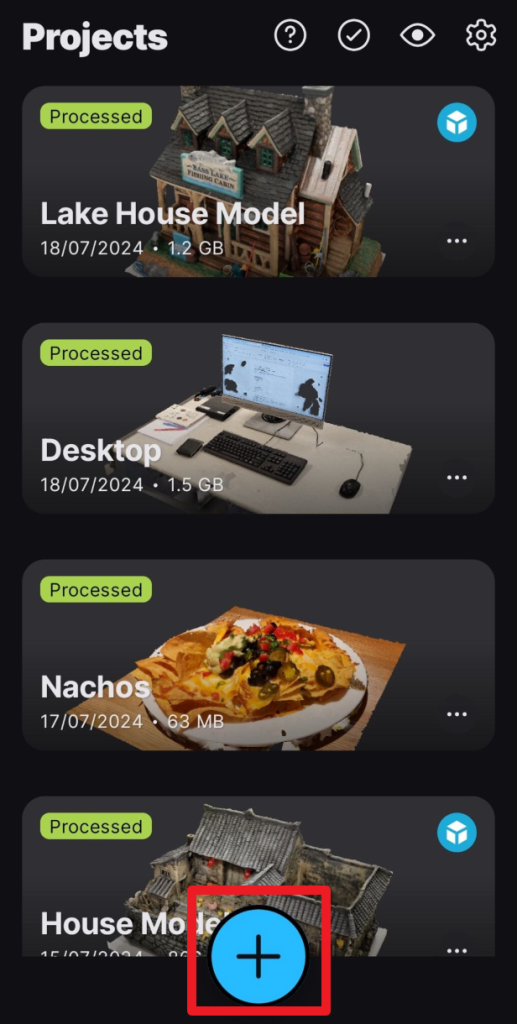
Opening RealityScan brings you to the application’s front page, where a list and preview of projects located in your device is shown.
There is a “+” button on the bottom of the page, which allows user to start a new project and direct the user to the capture screen.
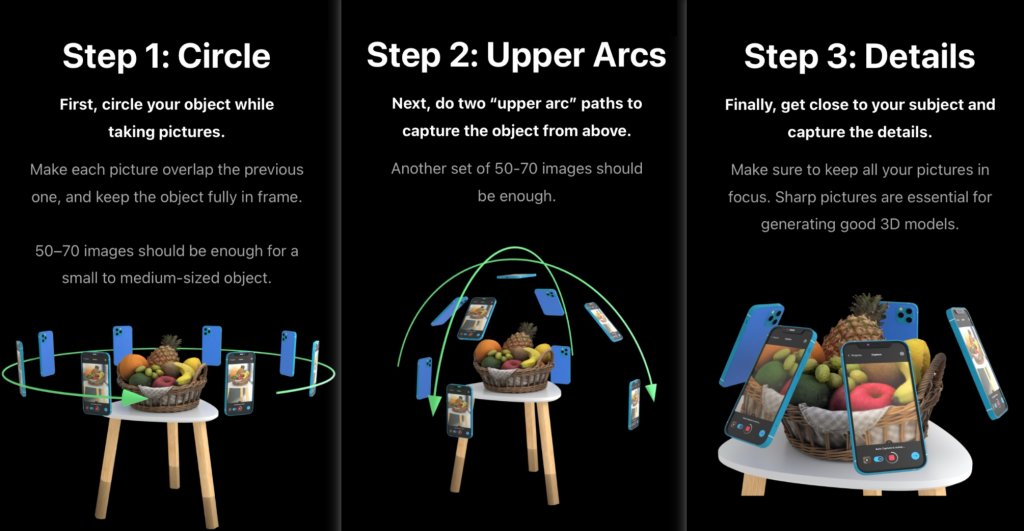
The capture screen has the capability to the auto-capture photos of the object you would like to take.
If you would like the application to auto-capture photos for you, it could be activated with the toggle button to the left of the shutter button. However, as the application does not show you where the focus of the photo is at, you would end up with a lot of blurry photos. In fact, we would recommend you to take photos manually as to be able to render textures with the highest quality.
You can see that there’s a number to the left of the auto-capture toggle button. That number shows the number of photos taken, and clicking on it also allows you to view photos that have been taken and processed.
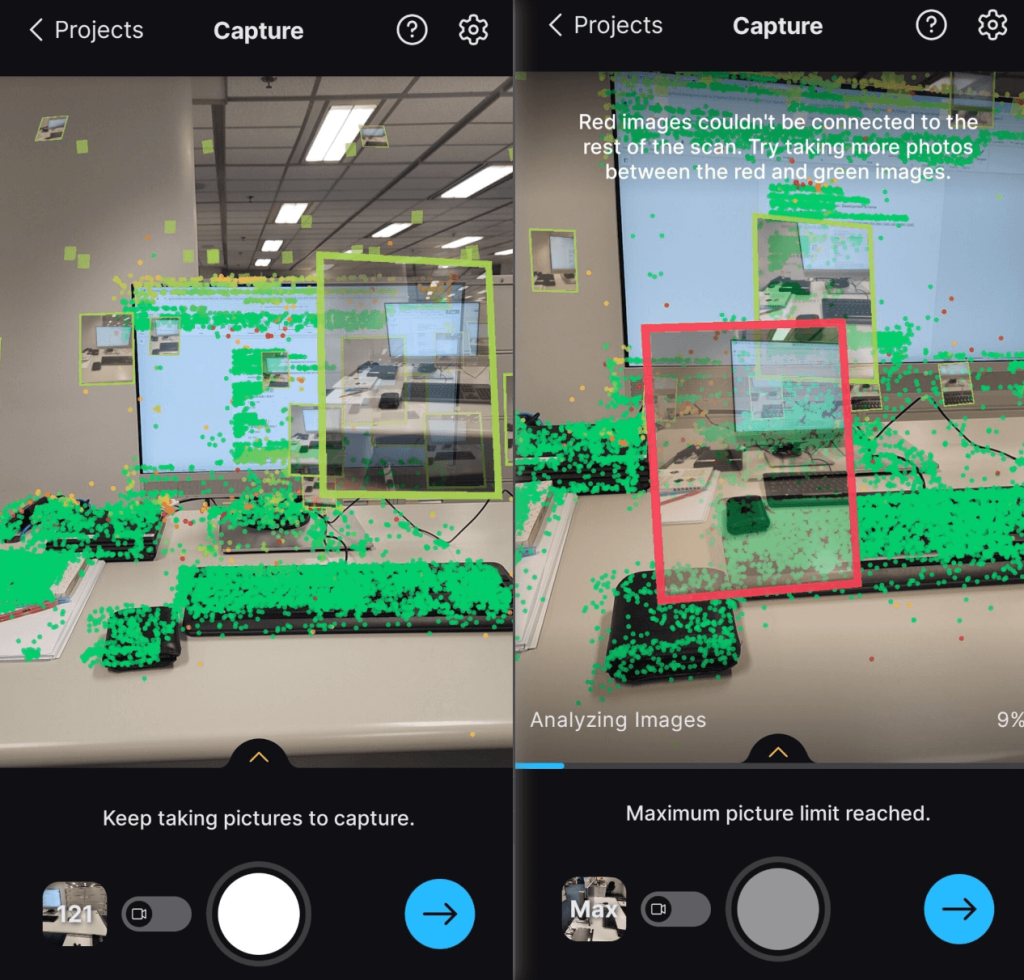
The images that are analyzed are shown in either a green frame or a red frame.
The green frame means that the photo is connected to other photos and can be analyzed, whilst red frame means that the photo cannot be detected to be connecting to the other photos and would as such require photos around that region to allow it to be connected in order to be analyzed by the point cloud function.
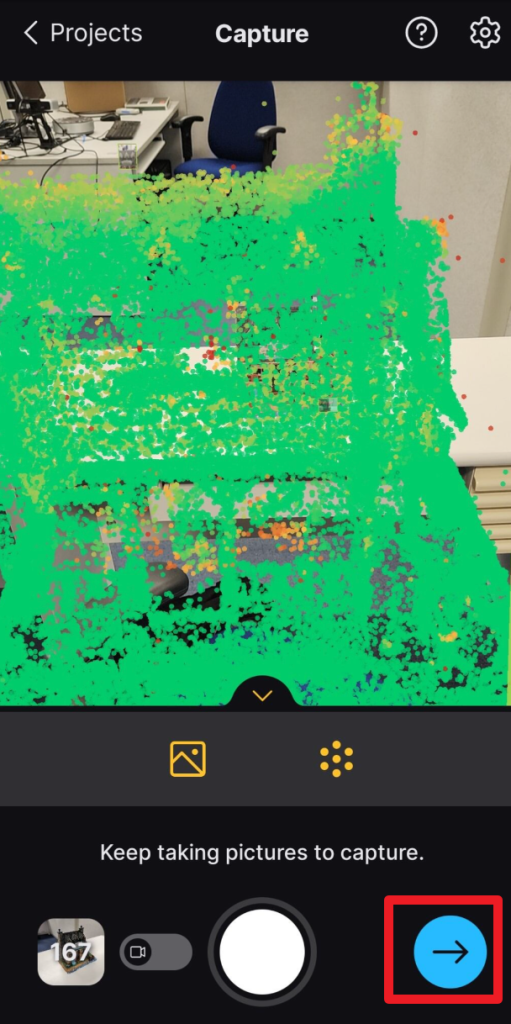
When you have taken around 20 photos, the point cloud function (represented by the 7-dot hexagon logo) would be able to be activated. The point cloud function gives the user a preview of the item captured using by displaying colored points, and these different-colored points attributes to the different quality of texture captured by the photos, with red points meaning that the point requires more photos to get a better quality of that point, whilst green points mean that the point is sufficiently captured by the photos taken around that area. The final product should be a dense outline of the structure with a lot of green points.
If you are satisfied with the number of photos captured or the number of points shown on the point cloud, you can click the blue button on the bottom right to continue to review your scan.
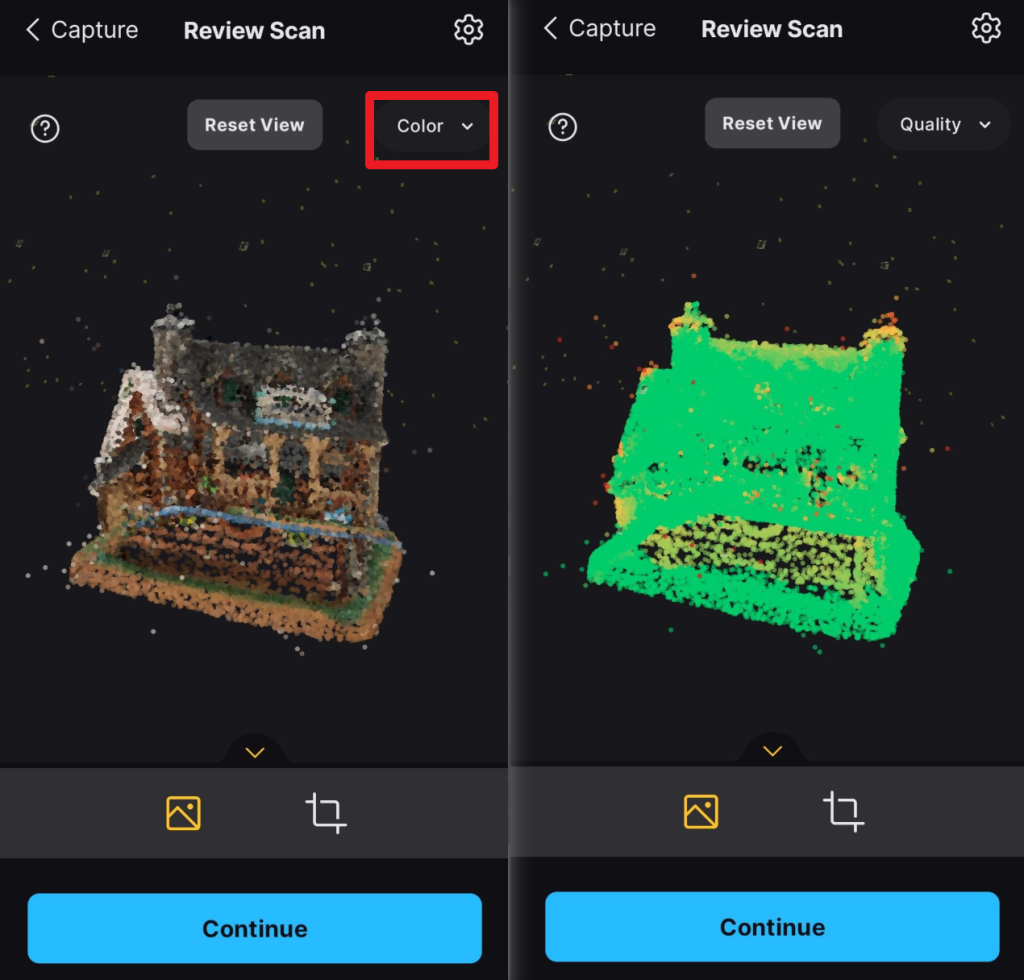
On the Review Scan page, a render of the product will be shown based on the photos taken and the point cloud generation. By default, it is shown in color (as seen by the dropdown button labelled color near the top right).
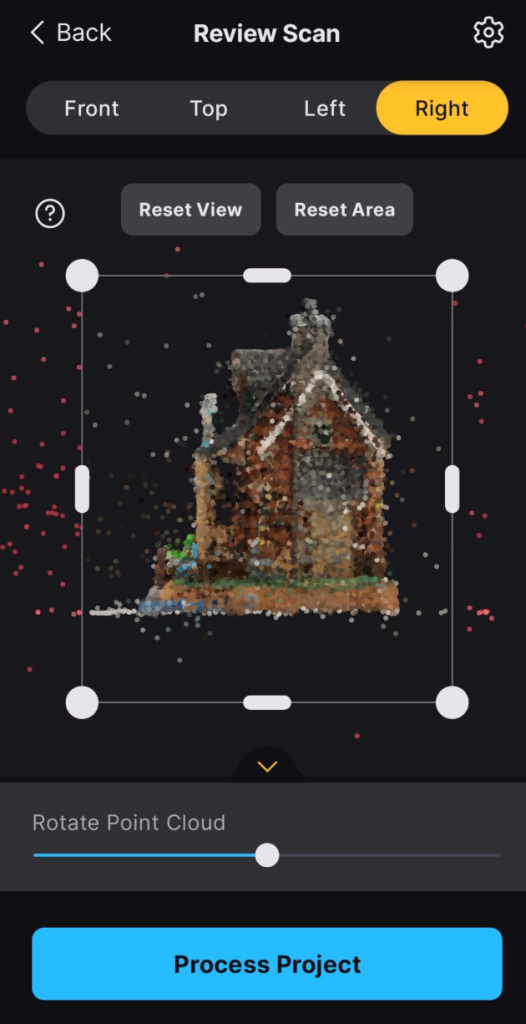
Clicking on the crop button on the right allows you to crop the region where the scan is processed. This allows us to remove background or objects that might have accidentally been scanned into the render, such as any background where the item is placed on, or items that are in the background during the shot but is not the object to be scanned. You can choose the type of view of the render above there set view button, where the frontal, top-down, left-side and right-side view can be chosen to show you the respective sides of the scan. A point that should be noted is that moving the region box on one side would affect the region box of the adjacent sides, so after editing the region box you should check all sides to see if the new region might accidentally cut off parts of the object scanned in different views.
Once the “Process Project” button has been clicked, the scan is processed and cannot be stopped, so only process the project when you are certain that the quality of the scan is what you desire, as there is no turning back after the button is pressed. Now, you can leave the app on the background and let the process run on itself.
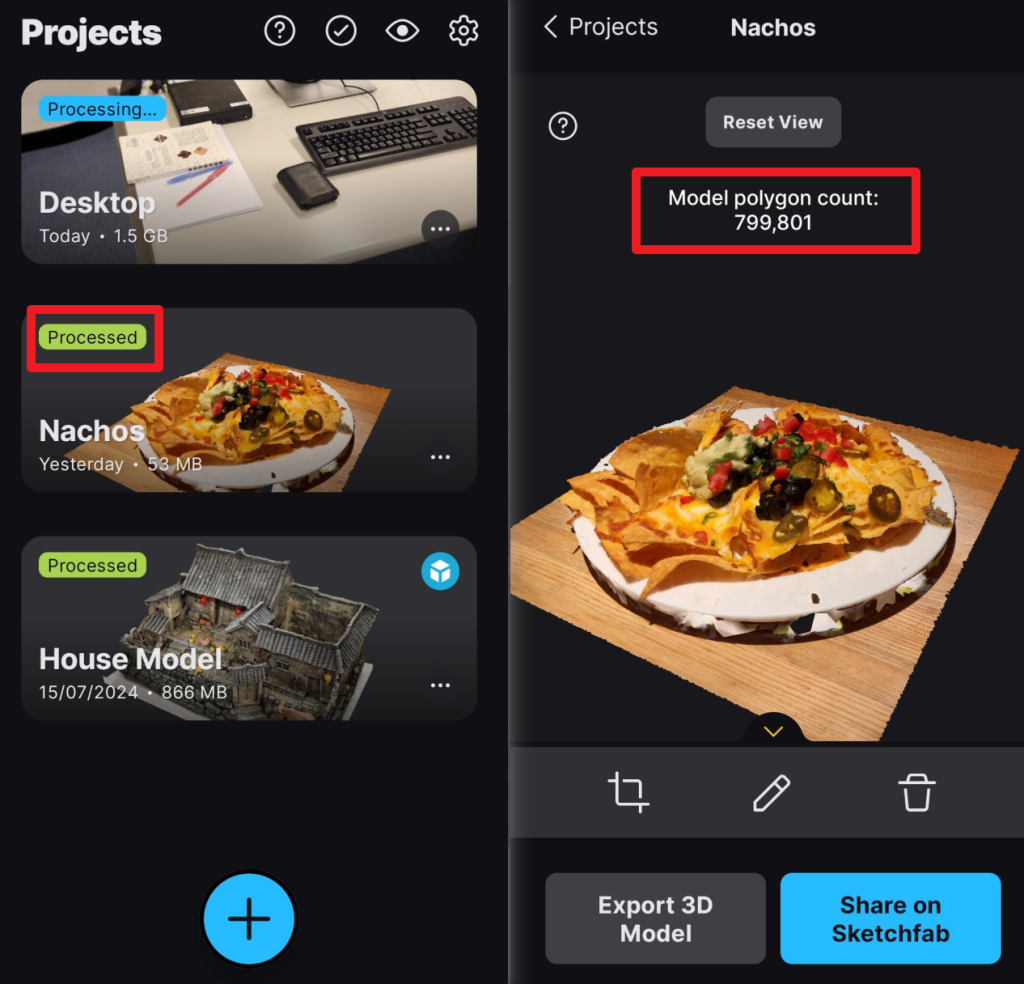
Once the processing is finished, the status of the scan will be changed to “Processed” and you can look at the scan by clicking into it. The total polygon count of the model is shown, so you can usually estimate how textured and detailed the model is by looking at the model polygon count.
You can also further crop the model, change the model name or delete the model by clicking on the 3 icons on the collapsible sidebar. If you believe the final model is generated well enough, you can export the 3D model as a zip or share it on Sketchfab to allow yourself to share it to the public or download it in other formats.
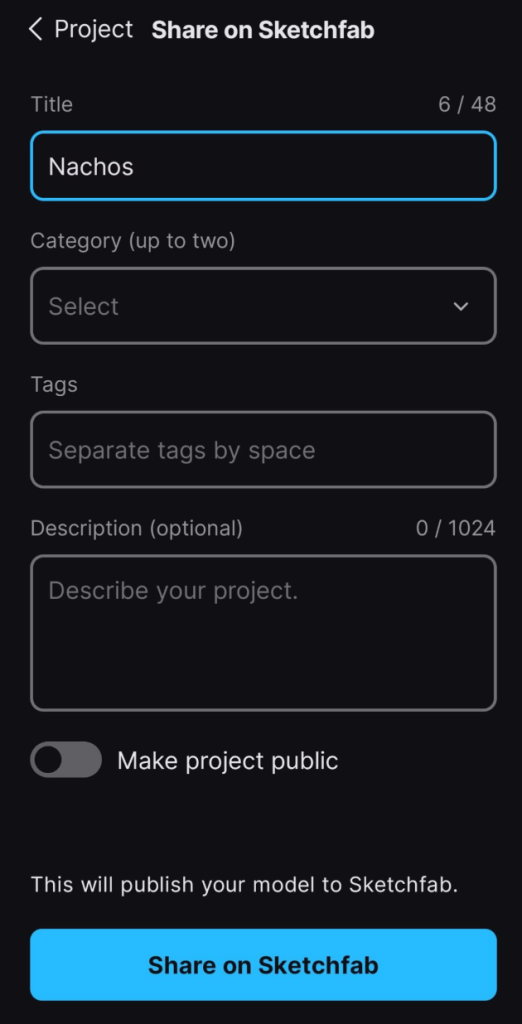
You are required to set a title for the project and select a category on the drop-down button, and you can also set tags, description and its status as a public model in this page. Once the blue button on the bottom is pressed, the model will be uploaded to Sketchfab (or if you do not have a Sketchfab account, a prompt will appear directing you to create an account first).
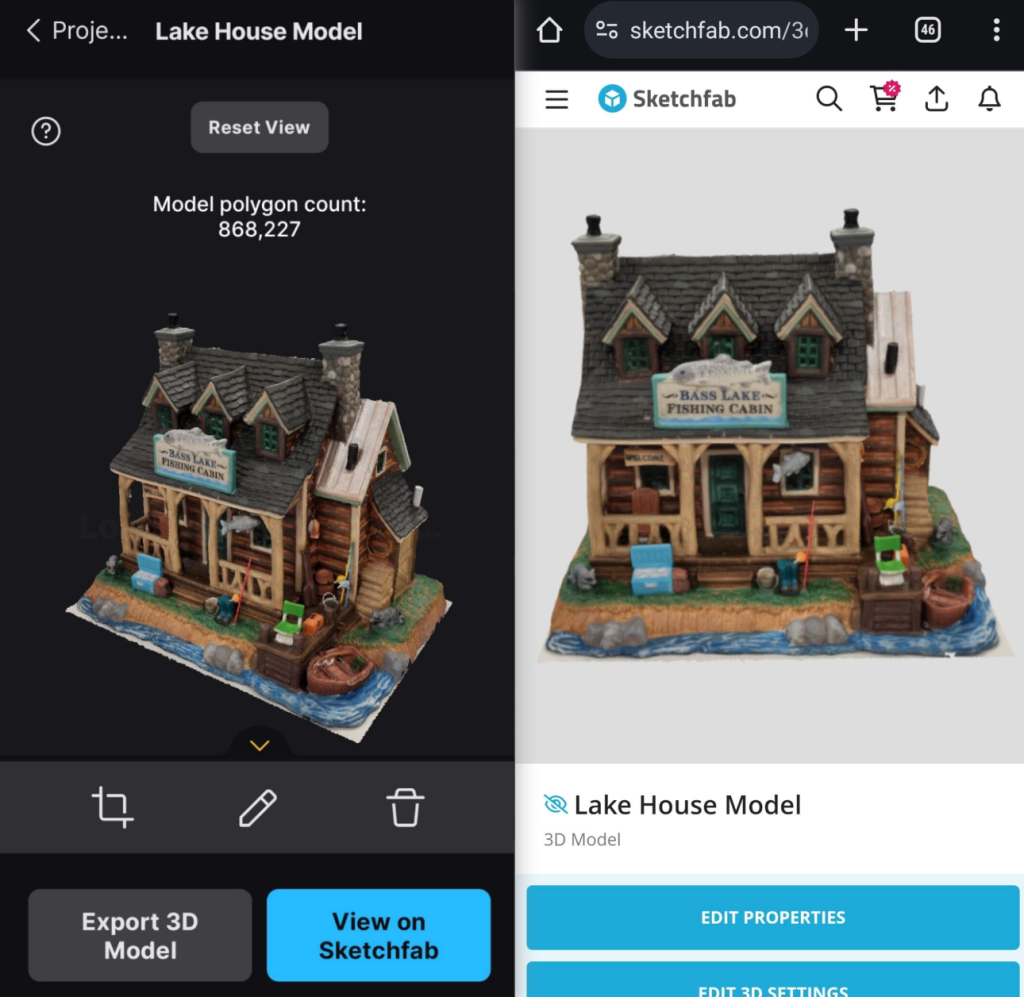
Additionally, after sharing on Sketchfab, you can directly click on the button to view it on Sketchfab. If you are on desktop, you also get the opportunity to download it in formats such as GL Transmission Format (.gltf), GL Transmission Format Binary file (.glb) or Universal Scene Description (.usdz). These formats allow you to import such assets into 3D computer graphics and game engines such as Unity 3D, Unreal Engine or Blender.
Conclusion
RealityScan is a very useful application in aiding your 3D asset scanning and creation needs, and is in my opinion one of the best free 3D scanning mobile applications available in the market for both android and apple users currently.
– By CHENG Nin Sun, Matthew (Year 4 student from BEng in Chemical and Environmental Engineering)
July 24, 2024
You may also be interested in…