Views: 11,745
In our “Learn Python From Zero For Absolute Beginner” series, you have learnt how to use Python to do some data manipulation tasks and create interactive charts using Plotly within Jupyter Notebook. After completing your analysis, it is common that you will need to deliver a presentation to present your findings.
Traditionally, this might involve manually capturing screenshots of your notebook’s code and charts, and creating static slides using PowerPoint or Canva for your presentation. However, there is a more time-saving and dynamic approach, allowing you to convert your Jupyter Notebook into interactive slides. You can showcase your code, visualizations, and insights while retaining the interactivity of the Plotly charts you created.
Give a try to this approach and captivate your audience with an interactive presentation experience derived directly from your Jupyter Notebook! At the end of this article, you will be able to convert your Jupyter Notebook (.ipynb file) to one single HTML file.
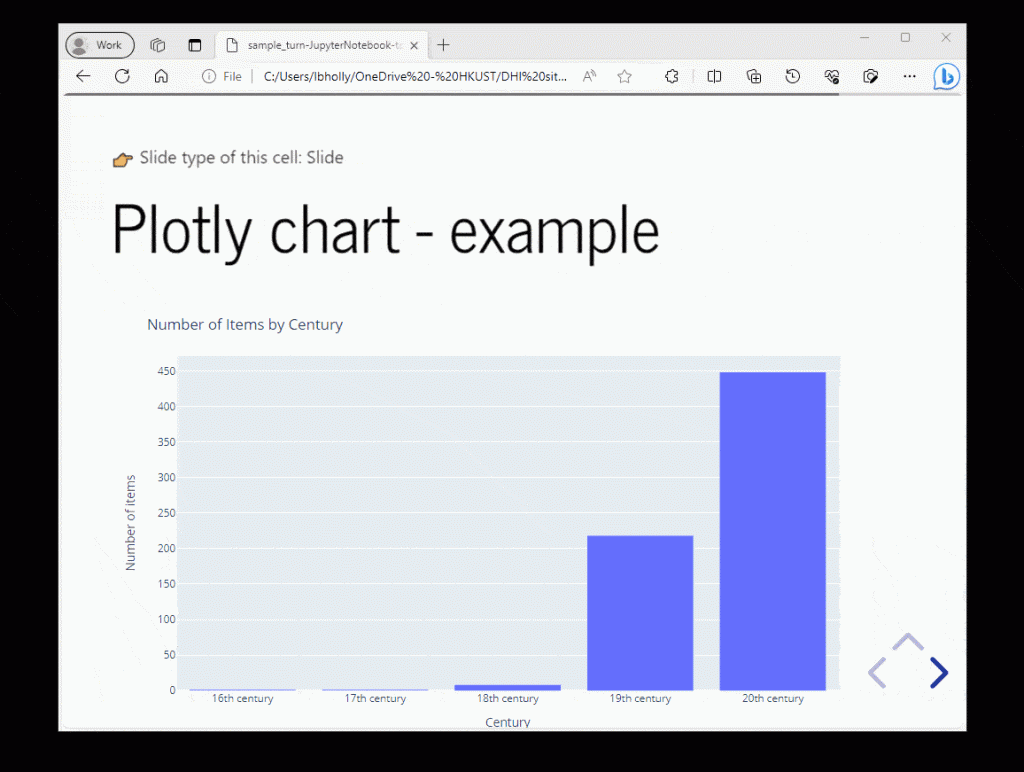
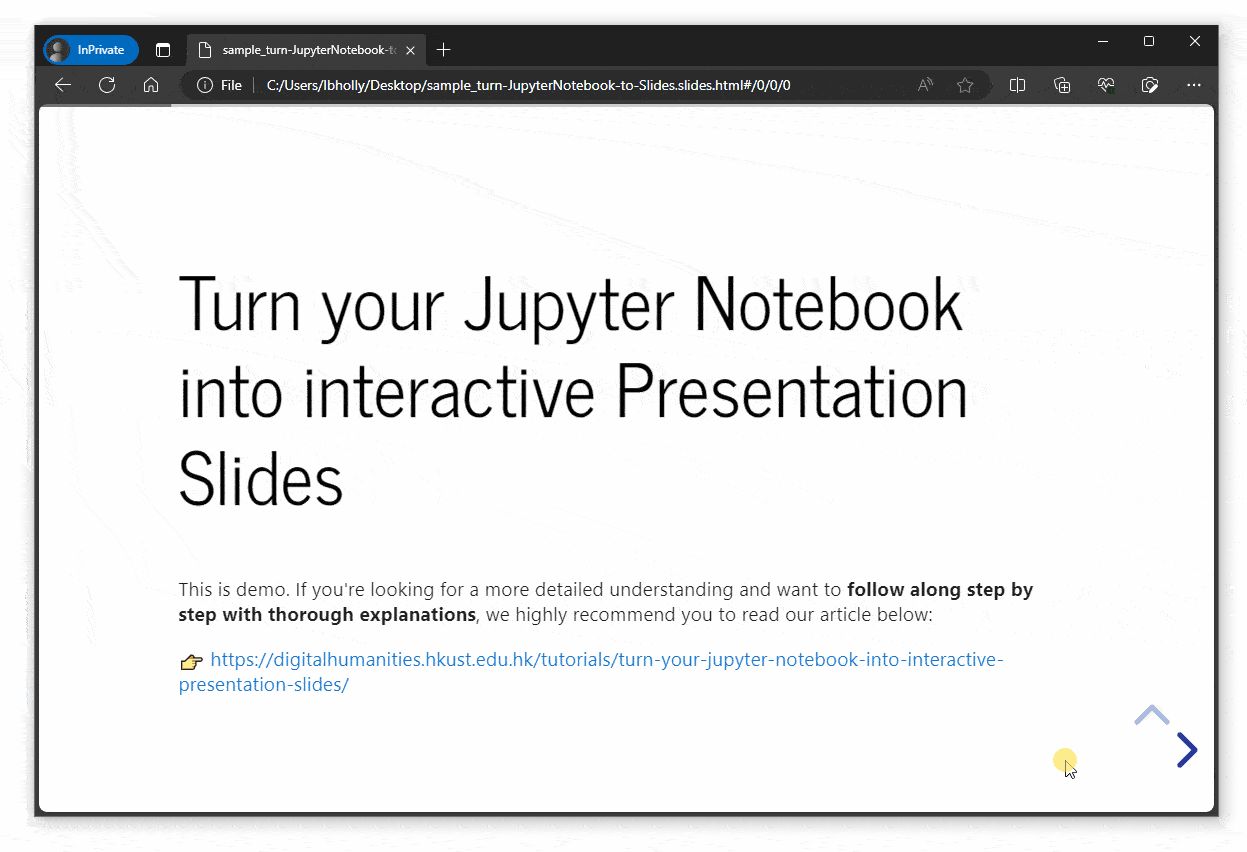
By double clicking the HTML file, you can view your Jupyter Notebook content as below in the browser:
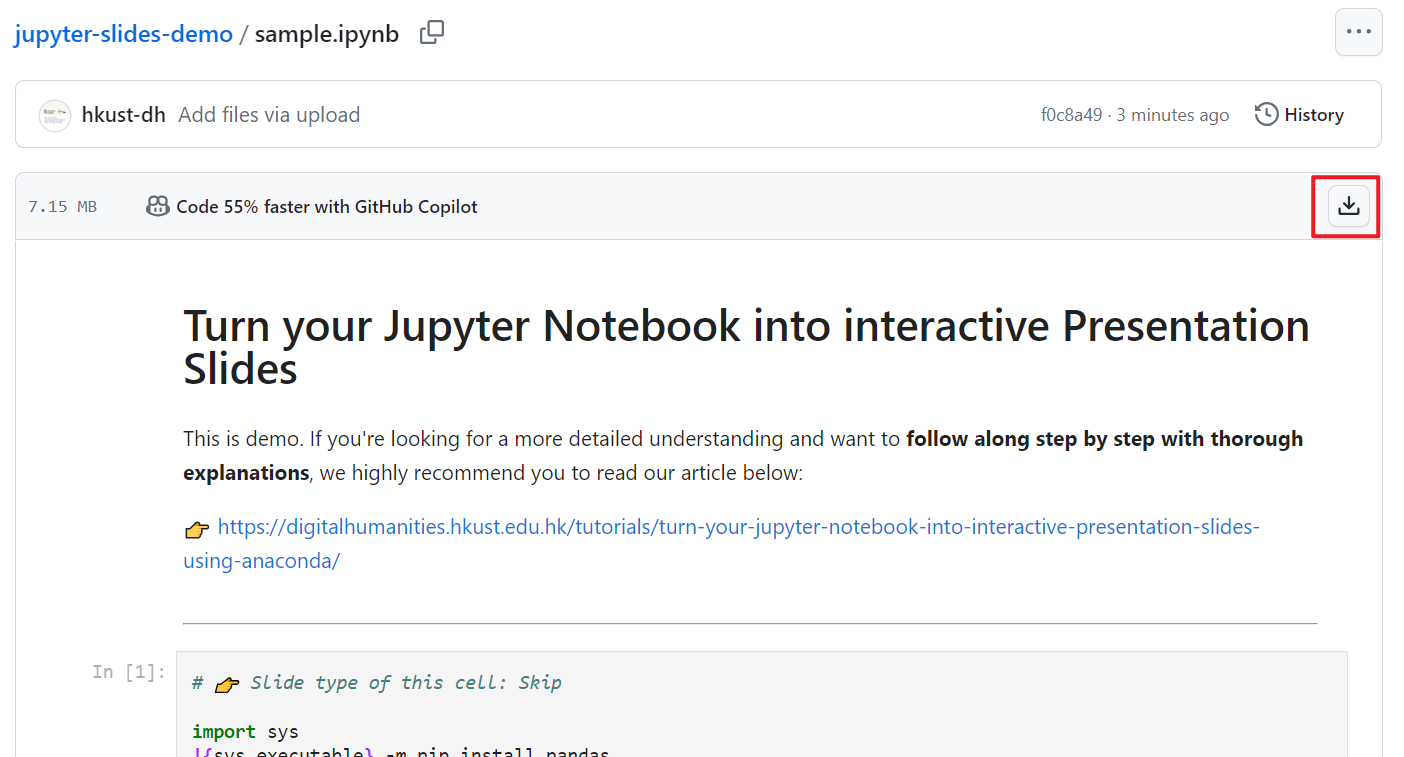
Download our sample and try it yourself
Before we proceed with configuring the settings in Anaconda to transform cells into slides, let’s first walk through the straightforward process of converting an .ipynb file to an HTML file.
To help you grasp the speed and simplicity of this conversion, please download our sample Jupyter Notebook (.ipynb file) here and follow the steps outlined below.
You may find the content in this .ipynb file familiar if you have been following our “Learn Python From Zero For Absolute Beginners” series as we have taken code snippets from the first two lessons and compiled them into this .ipynb file.
Convert ipynb file to HTML file
1. Open Powershell Prompt in Anaconda
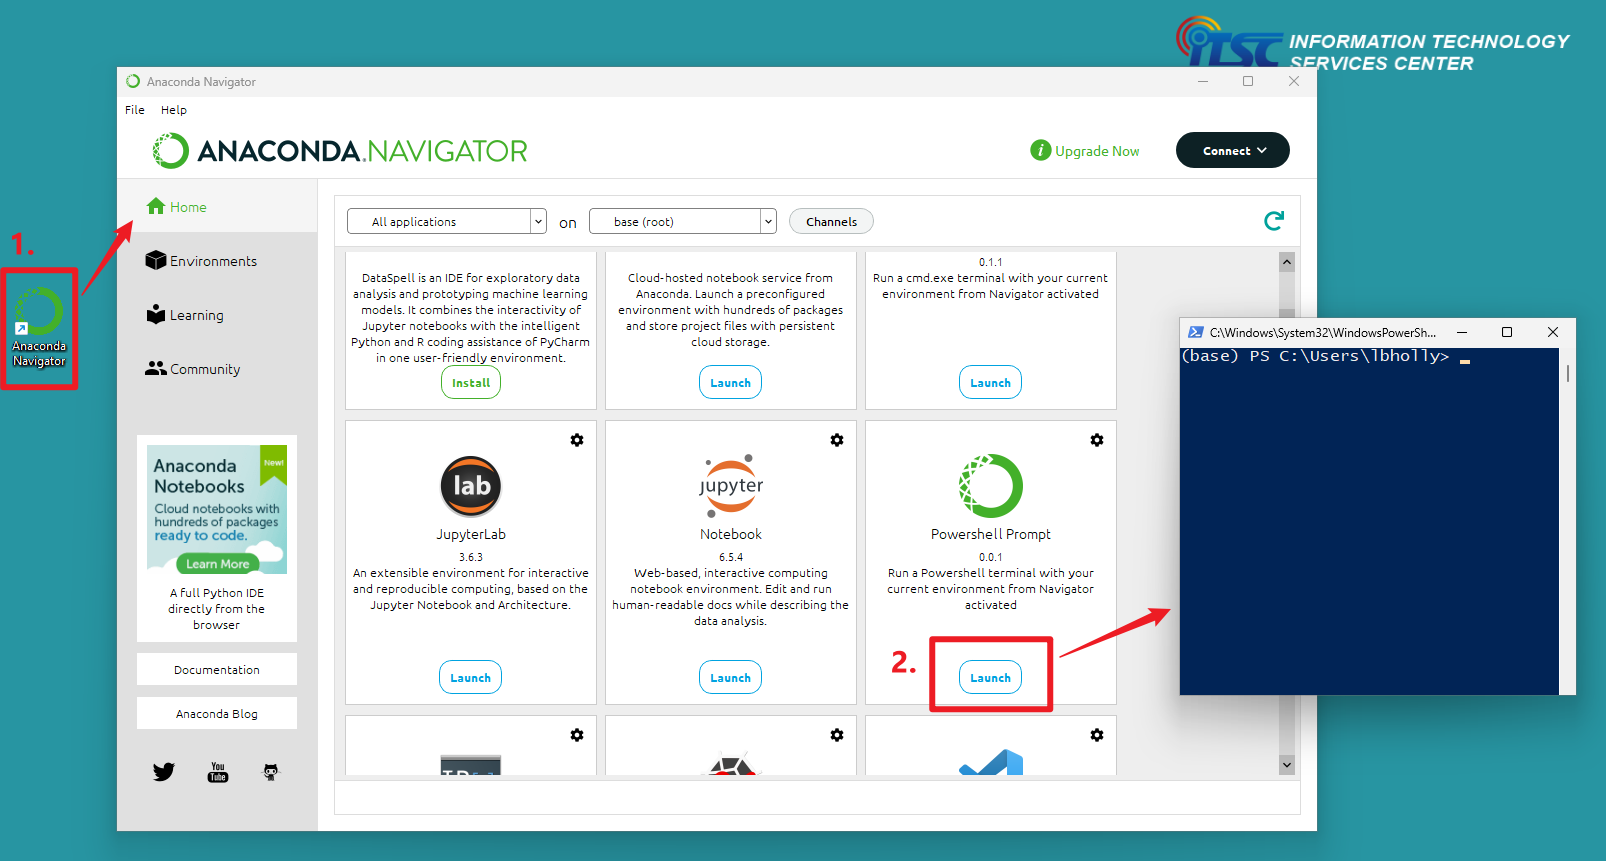
If you need guidance on how to install or use Anaconda, you can refer to our previous article here.
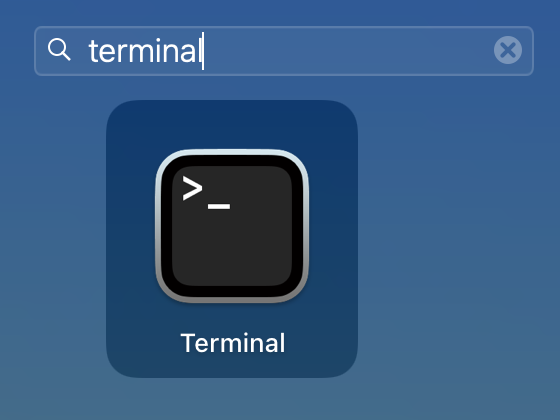
If you are a Mac user, you have the advantage of utilizing the Terminal directly on your Mac for the subsequent steps.
- Windows user: Powershell Prompt in Anaconda
- Mac user: Terminal in Mac
2. Change directory to current folder
In the Powershell Prompt window or Terminal, use the cd command to change directory to the folder that you stored the .ipynb file.
Method 1: Using command below
cd folderpath
Method 2: Drag and drop
Drag and drop the folder where storing the .ipynb file to the Powershell Prompt window or Terminal after typing cd .
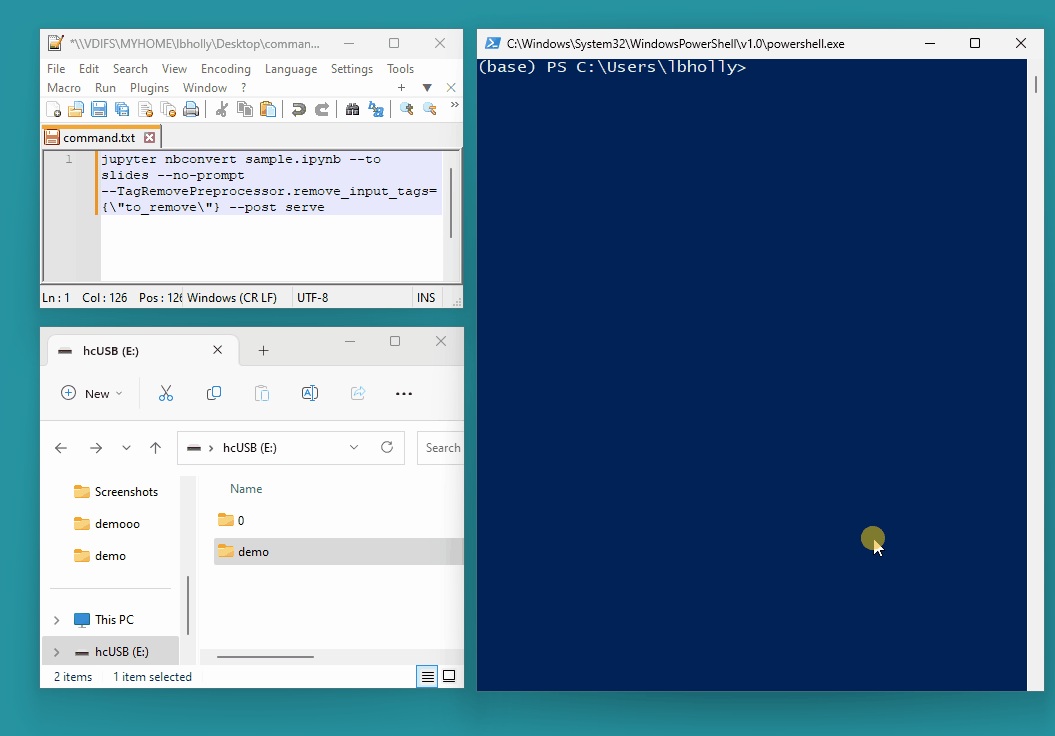
3. Type jupyter nbconvert command
Type the command below in the Powershell Prompt window. You may change sample.ipynb to the filename of your .ipynb file. This command uses nbconvert tool to convert an .ipynb notebook file into various static formats like HTML.
jupyter nbconvert sample.ipynb --to slides --no-prompt --TagRemovePreprocessor.remove_input_tags={\"to_remove\"} --post serve If you are using Terminal in Mac, you may need to execute the following command before executing the jupyter nbconvert command.
export JUPYTER_PATH=/opt/homebrew/share/jupyter:$JUPYTER_PATH
After executing the jupyter nbconvert command, an HTML file will be automatically generated in the current folder (sample.slides.html in this case). The generated HTML file retains the content and structure of the ipynb Notebook, now conveniently presented in a slide format. One notable advantage is that the generated HTML file has a relatively small file size, which is beneficial for sharing and transferring files.
If you have a good understanding of HTML, you can further customize the generated HTML file, making modifications to the styling or content of the slides.

Configure settings in Jupyter Notebook to transform cells into slides
Before proceeding with the conversion process to HTML as outlined above, you need to make some configurations in Jupyter Notebook using Anaconda.
This configuration allows you to selectively choose which cells to display, ensuring that only the relevant content appears in the HTML output, showcasing the most important code snippets, explanations, and visualizations. This flexibility empowers you to tailor the HTML slides to your specific needs and deliver a concise and impactful presentation to your audience.
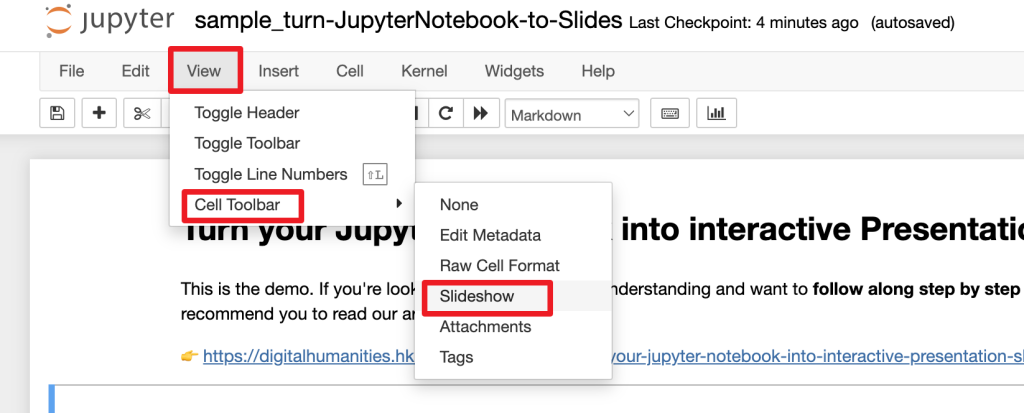
1. Enable Slideshow View
In the menu bar, click “View” → “Cell Toolbar” → “Slideshow“.
2. Select Slide Type for each cell
After enabling the slideshow view, you can now select the “Slide Type” of each cell at the top right hand corner.
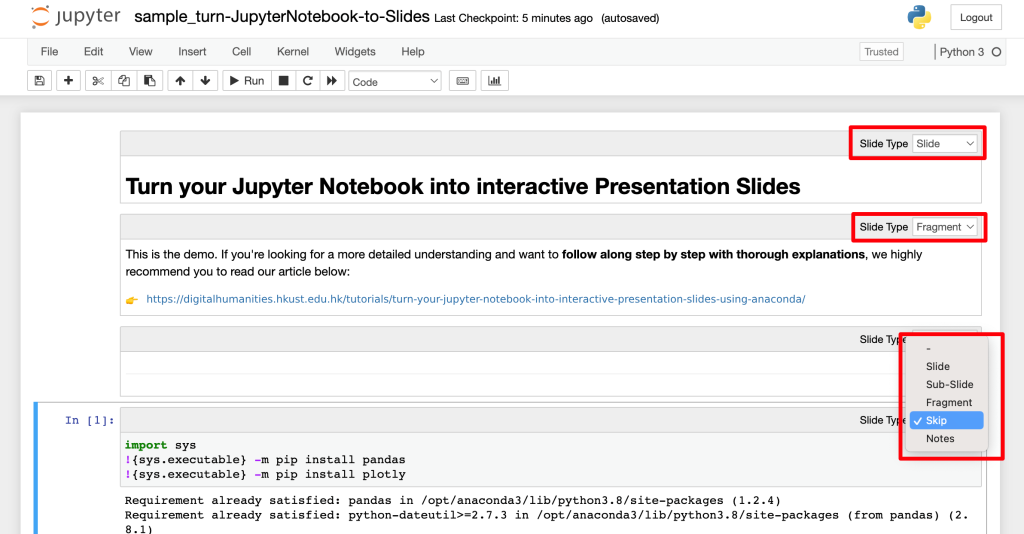
Explanation of each “Slide Type”
| Type | Explanation | |
|---|---|---|
| Slide | a main slide | |
| Sub-Slide | a sub-slide which will be shown when using the down arrow navigation (▼) | |
| Fragment | the cell content will be inside the main slide with a fade-in transition | |
| Skip | the cell content will not be displayed in the presentation slide | |
| Notes | speaker notes for the slide, the cell content will not be displayed in the presentation slide |
3. Add Tag to hide code of charts on the slide
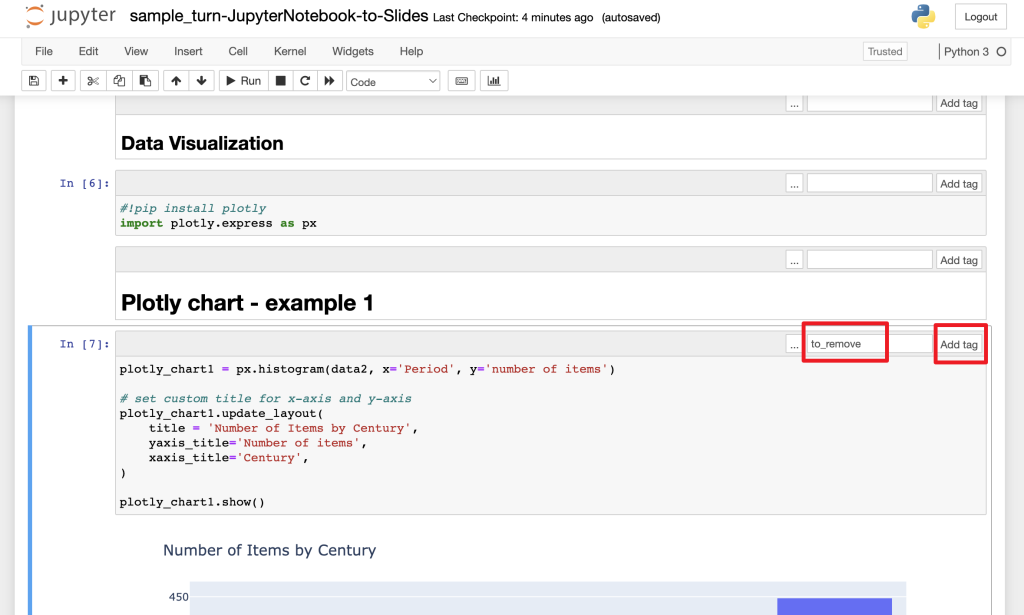
If you prefer showcasing charts or visualizations on the slides without including the corresponding code, you can assign specific tags to the desired cells.
In the menu bar, click “View” → “Cell Toolbar” → “Tags“.
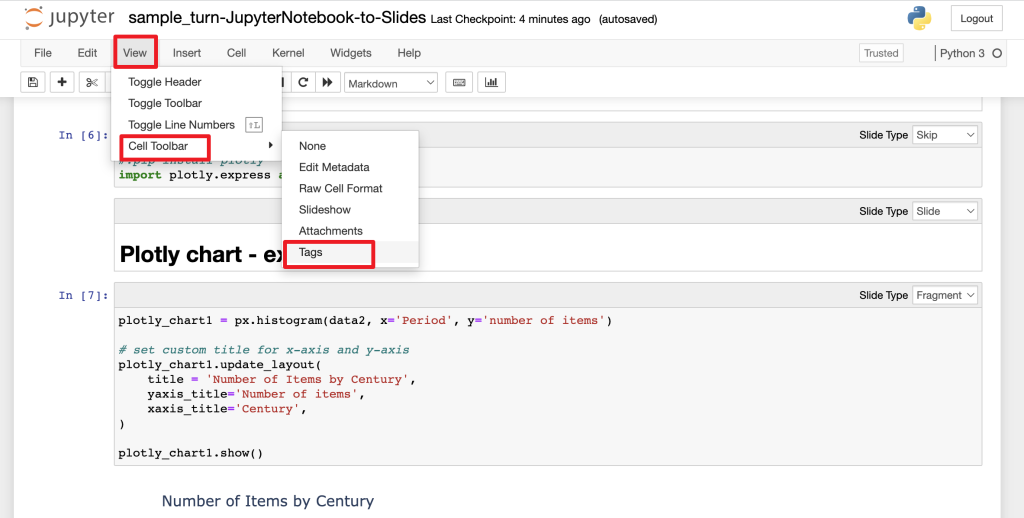
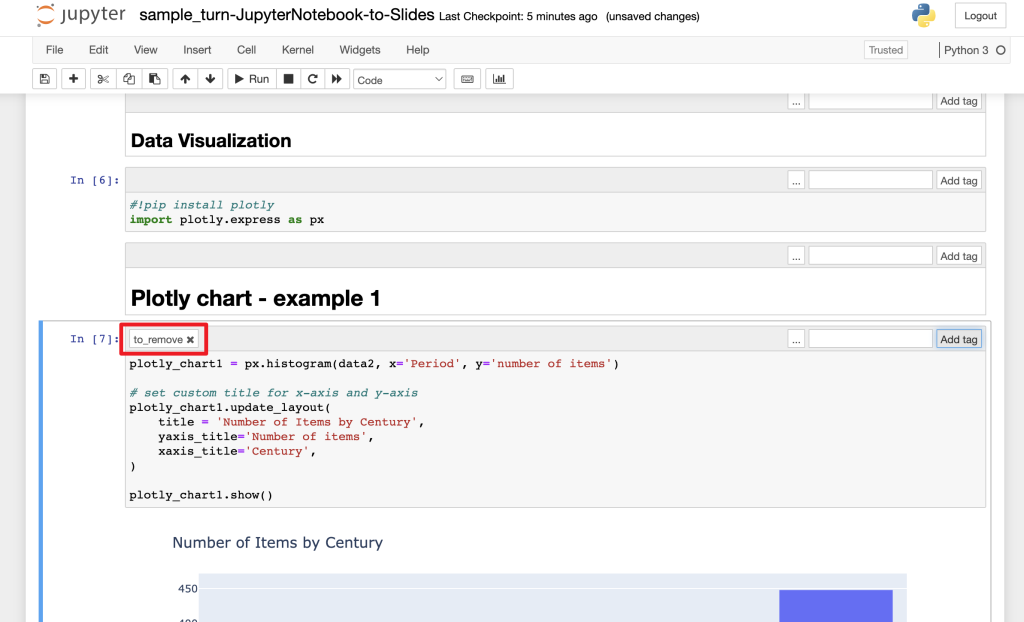
Type to_remove in the top right hand corner of the cell, and click “Add tag“.
After configured each cell in Jupyter Notebook using Anaconda, you can now follow the steps in the previous section “Convert ipynb file to HTML file” to turn your Jupyter Notebook into interactive HTML Presentation Slides.
The generated output is a single HTML file, making it incredibly convenient to share and save on a USB drive. Simply double-click on the HTML file to open it in any web browser. This portability and accessibility make it ideal for presenting in a classroom setting too. Good luck on your presentation!
Next article – host HTML file online
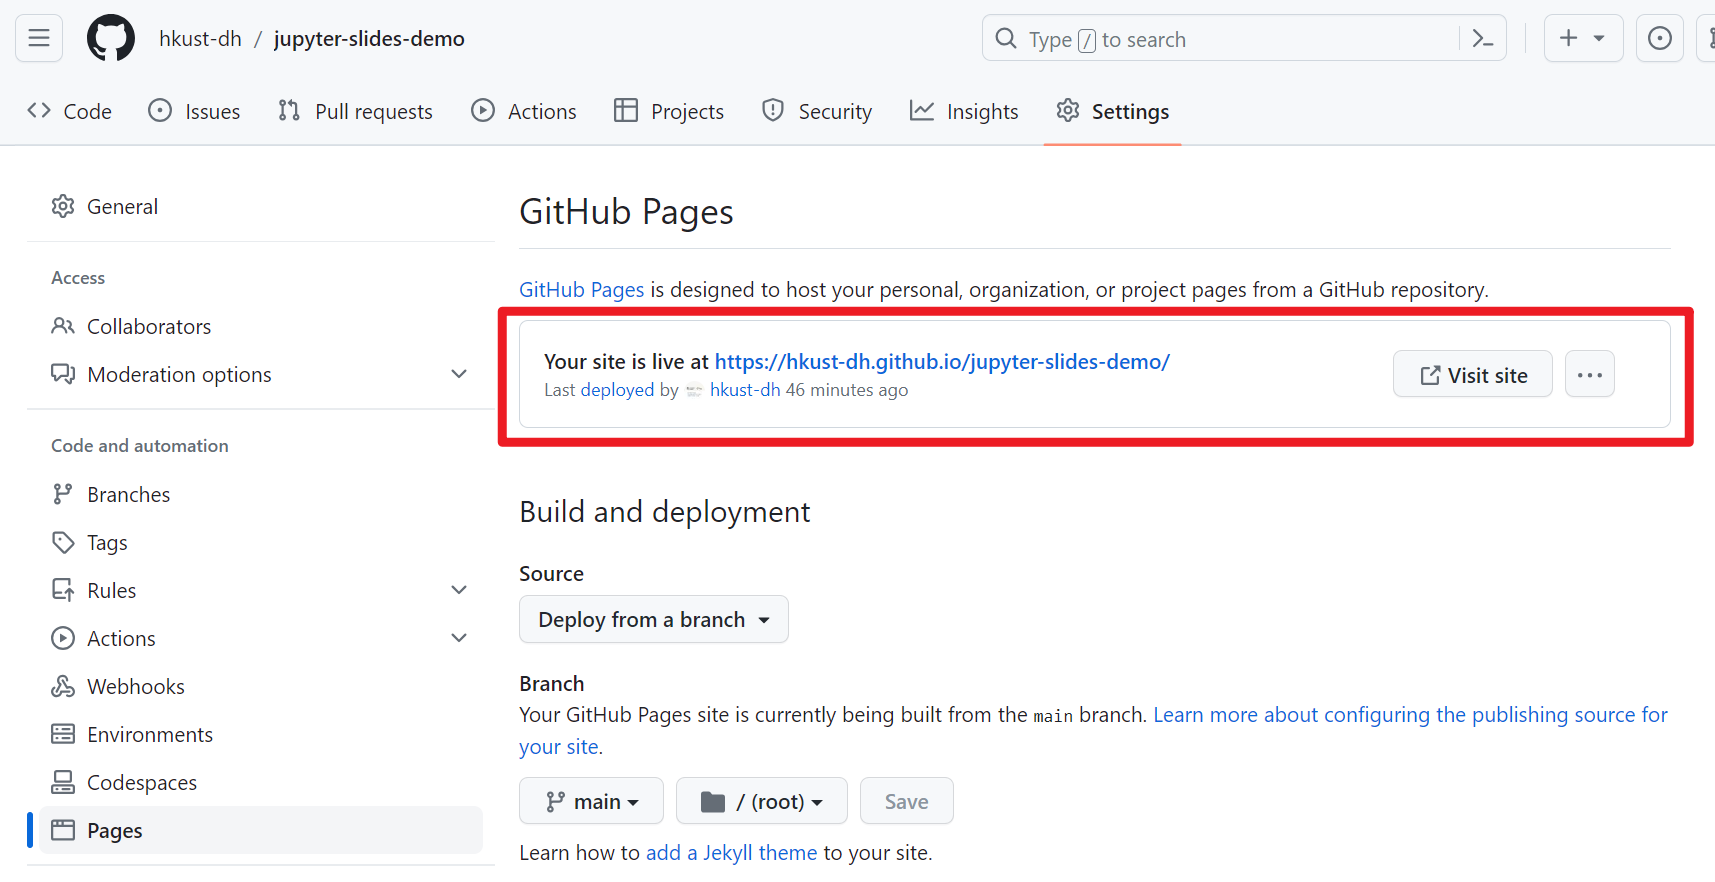
As the converted file is in HTML format, you can also choose to host it as a website online like below. In our upcoming article, we will guide you through the process of hosting your HTML file on GitHub Pages. Stay tuned!
References
Kam, M. (2020, June 28). Creating an interactive presentation with Jupyter Notebook and Plotly. Things Michael Thinks. https://www.michaelkam.id/data-visualisation/2020/06/28/creating-an-interactive-presentation-with-jupyter-notebook-and-plotly.html
Krishnamurthy, D. (2015, December 5). Jupyter Notebook, Reveal.js and Github Pages. kdheepak. https://kdheepak.com/blog/jupyter-notebook-revealjs-and-github-pages
Mayeesha, T. (2018, February 12). Present your data science projects with Jupyter Notebook slides! Medium. https://medium.com/learning-machine-learning/present-your-data-science-projects-with-jupyter-slides-75f20735eb0f
– By Holly Chan, Library
October 6, 2023
You may also be interested in…