Views: 1,649
In the previous article, we showed you how to convert a Jupyter Notebook (.ipynb file) into an HTML file, providing a portable and shareable format that can be easily sent or stored on a USB drive for viewing. In this article, we’d like to highlight another option: publishing the HTML file online. With the help of GitHub Pages, deploying an HTML file as a website becomes remarkably simple.
Demo: https://hkust-dh.github.io/jupyter-slides-demo/sample.slides.html
1. Create a new repository in Github
1. If you do not have a GitHub account yet, please create one before proceeding further.
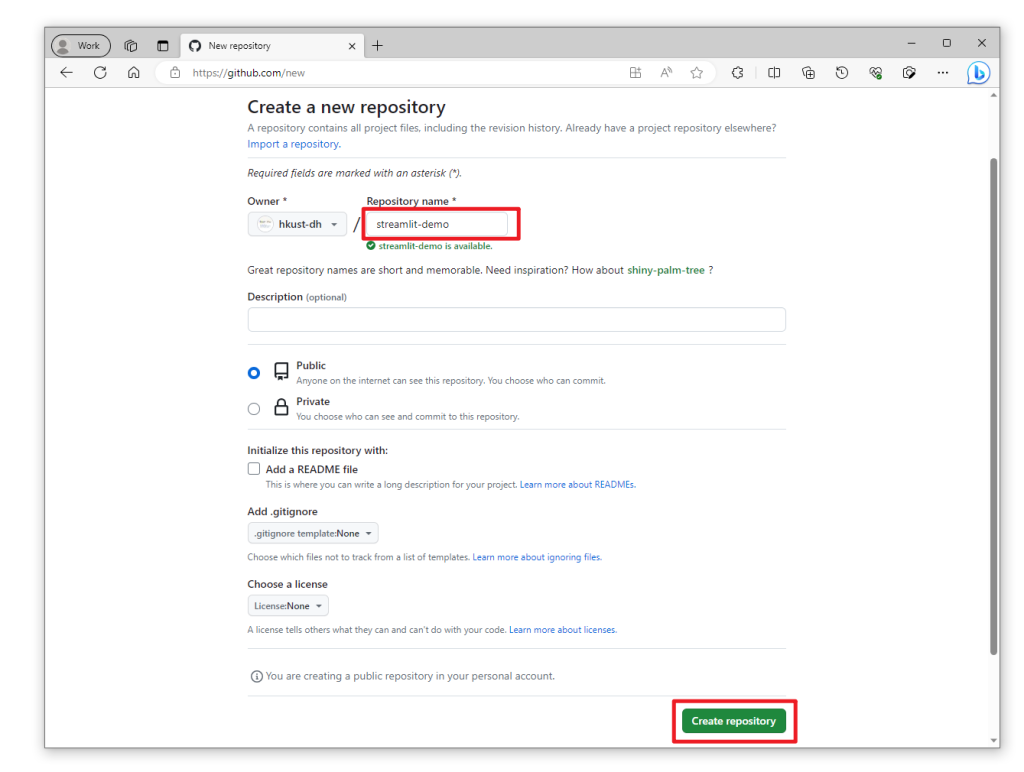
2. Create a new repository https://github.com/new (see screenshot below)
Feel free to type in any repository name that you prefer when creating your GitHub repository.
Your website URL will follow the format: https://
While you can rename the repository name afterward, be mindful that changing the repository name will also affect the website URL. After renaming the repository, the URL to access your website will be updated accordingly.
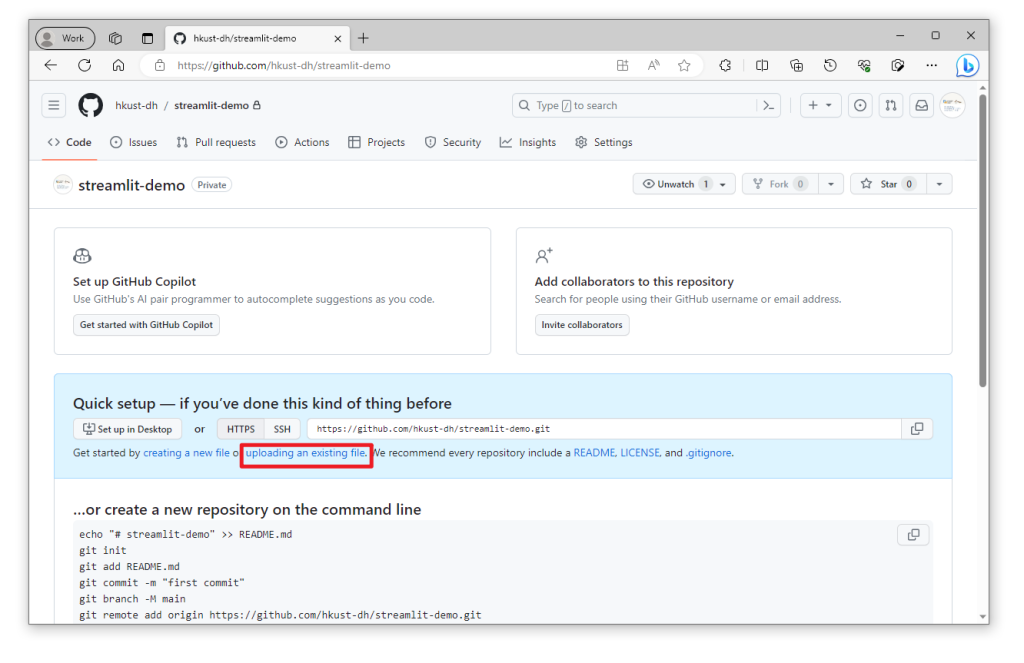
2. Upload file to Github repository
If your HTML file is named
https://
If your HTML file has a different name, you’ll need to include the file name in the URL to access it.
For example, if your HTML file is named
https://
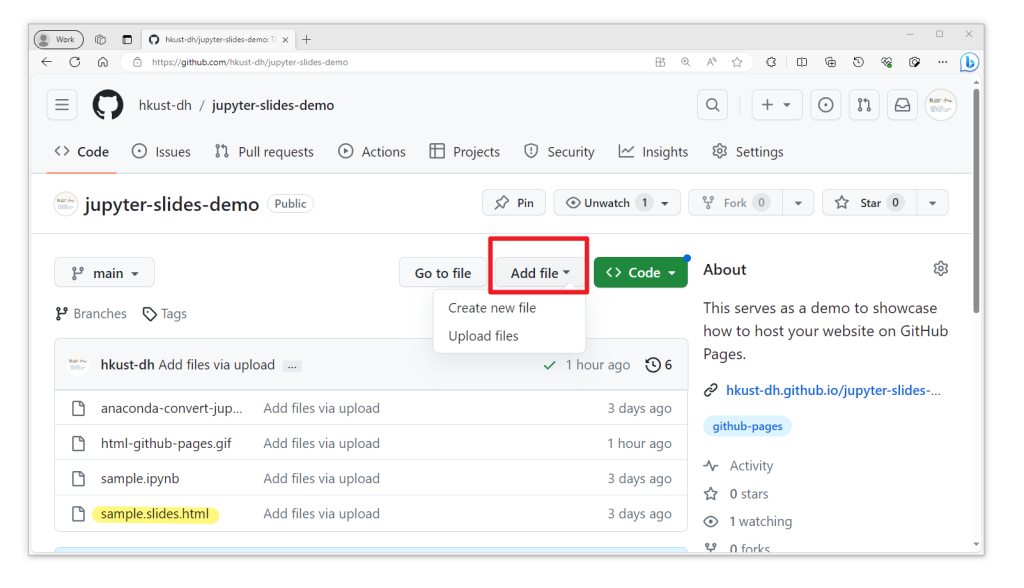
In the example below, we uploaded an HTML file named
https://hkust-dh.github.io/jupyter-slides-demo/sample.slides.html
3. Enable Github Pages
- Click on the “Settings” located towards the right-hand side of the repository navigation menu.
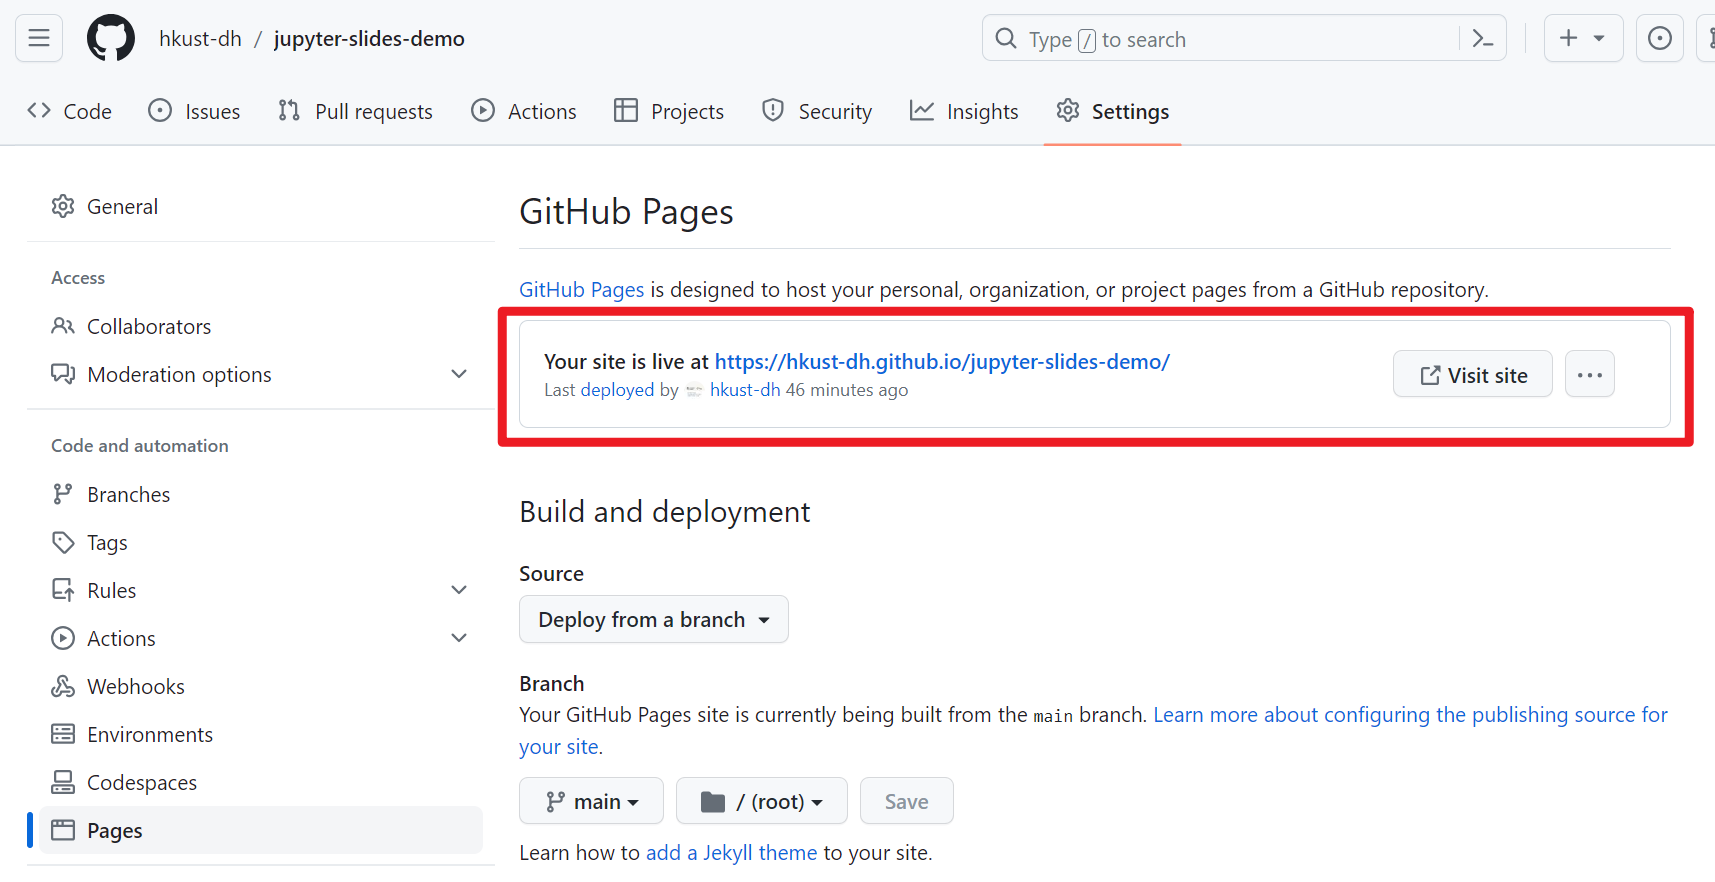
- Click “Pages” on the left-hand side for the Github Pages section.
- Select main branch as the source for GitHub Pages.

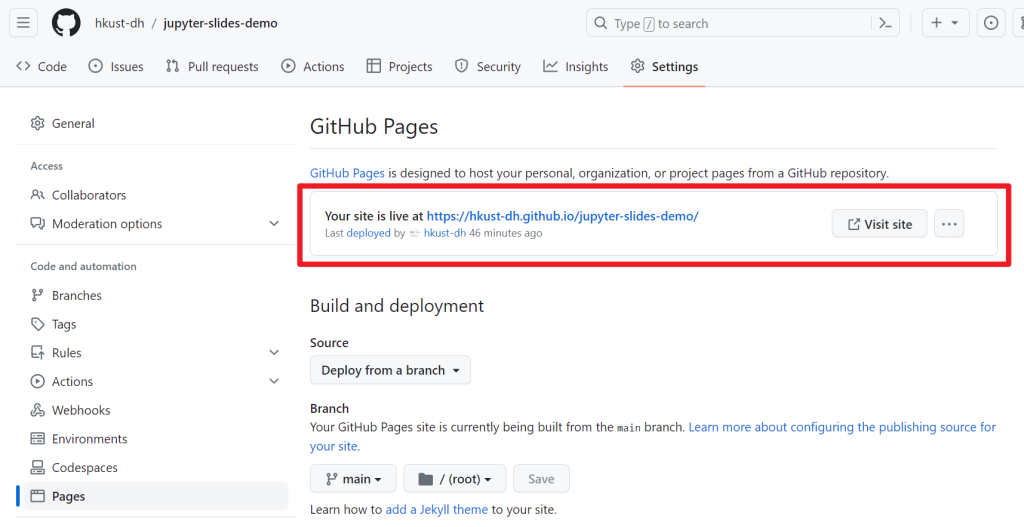
4. Wait for a few minutes and refresh the page. You will see the message “Your site is live at …..”.
Your HTML file now goes live and accessible via the provided URL!
Let’s showcase your work using GitHub Pages to publish your HTML-based website with ease!
– By Holly Chan, Library
October 9, 2023

