Views: 1,284
Introduction
When conducting humanities research such as anthropological fieldwork and oral history interviews, or working on any other audio-based projects, getting high-quality recordings is important. However, audio files can sometimes have background noise, such as the traffic noise by the passing cars and the voices of nearby pedestrians, that could end up detracting from the clarity of the recording.
There is a handy tool that can help us clean up those noisy audio files – Audacity. This free, cross-platform software (support Windows, macOS, Linux) is a powerful audio editor that can help us reduce background noise and make our recordings clearer. In this article, we’ll walk you through the step-by-step process of using Audacity to improve the quality of your audio.
Steps
1. Download the software “Audacity” here: https://www.audacityteam.org/download/
2. Open the audio file in Audacity by clicking “File” → “Open…” in the top menu bar or use the shortcut Ctrl+O or directly drag the audio file to the Audacity interface.
3. To hear your recording, simply click the green play “►” button.
Next, identify a section, preferably a few seconds long, that captures only the background noise, and select that portion.
Tips: Holding down the “Ctrl” key while scrolling your mouse wheel to zoom in closer on the audio, making it easier to accurately select the background noise portion.
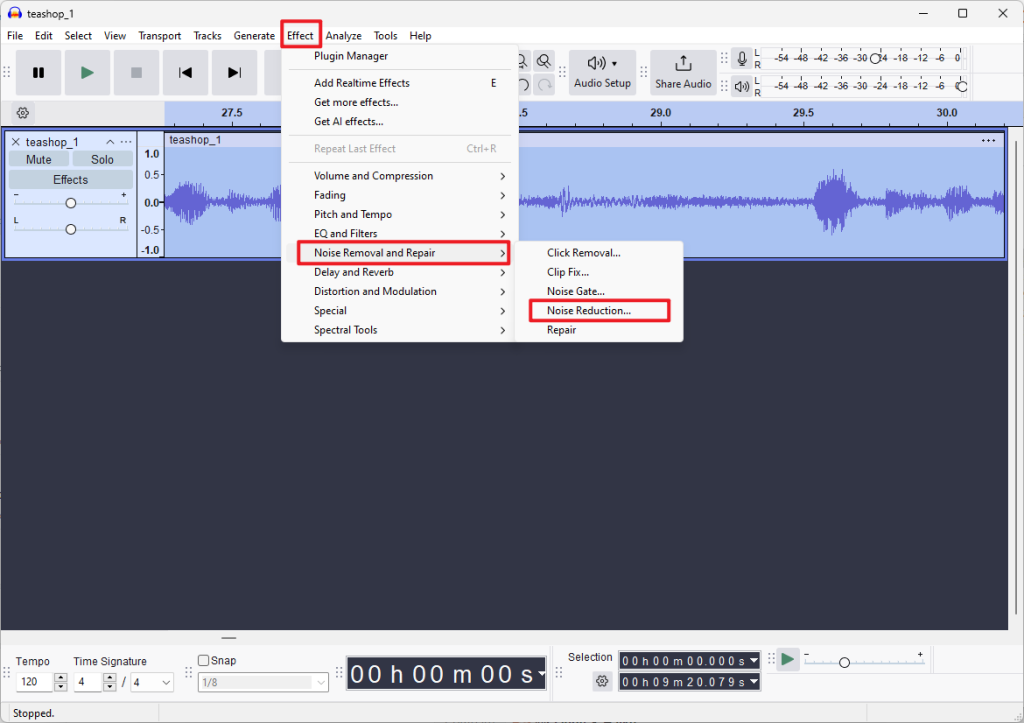
4. In the top menu bar, click “Effect” → “Noise Removal and Repair” → “Noise Reduction…”.
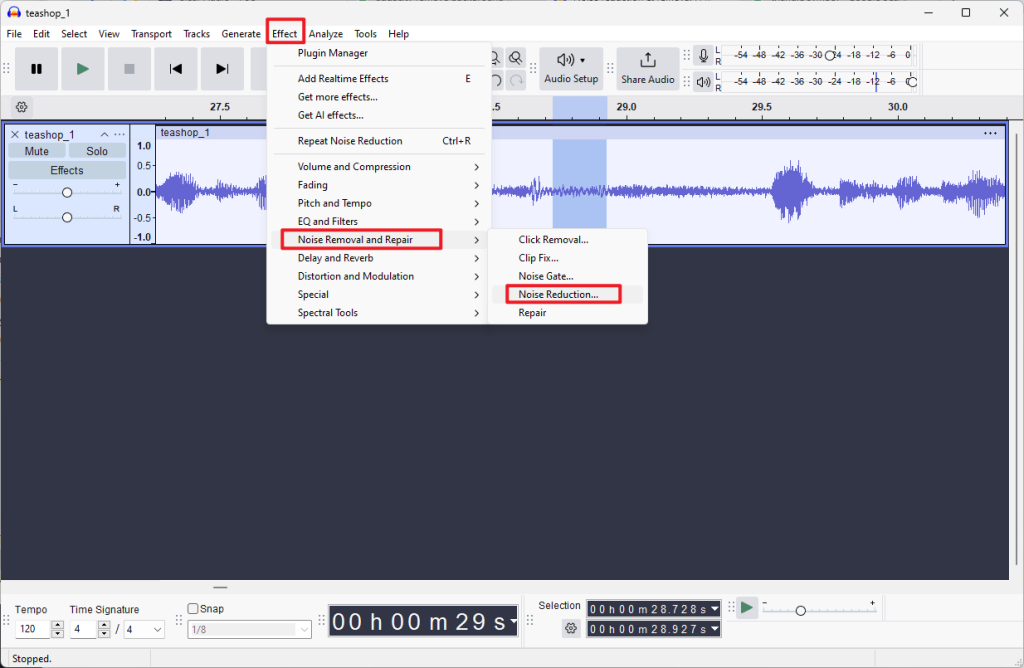
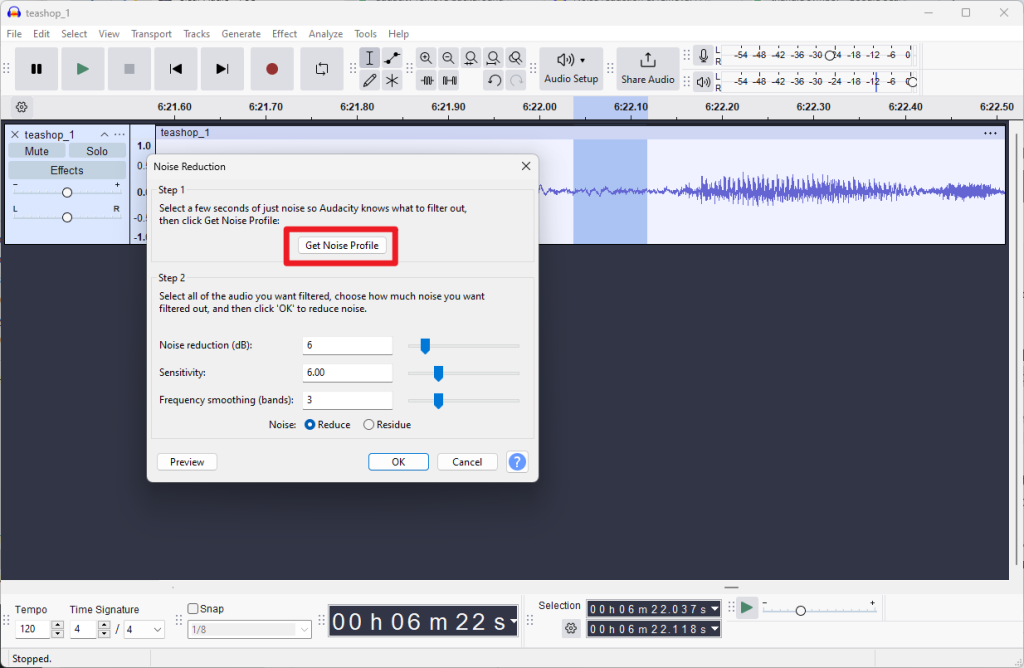
5. In the pop up window, click the “Get Noise Profile” button, and then click “OK”.
Now, the background noise sample is collected. Audacity now knows what to filter out in the next step.
6. Highlight the entire audio that you would like to apply noise reduction to.
7. Repeat step 4: Go to top menu bar, click “Effect” → “Noise Removal and Repair” → “Noise Reduction…”.
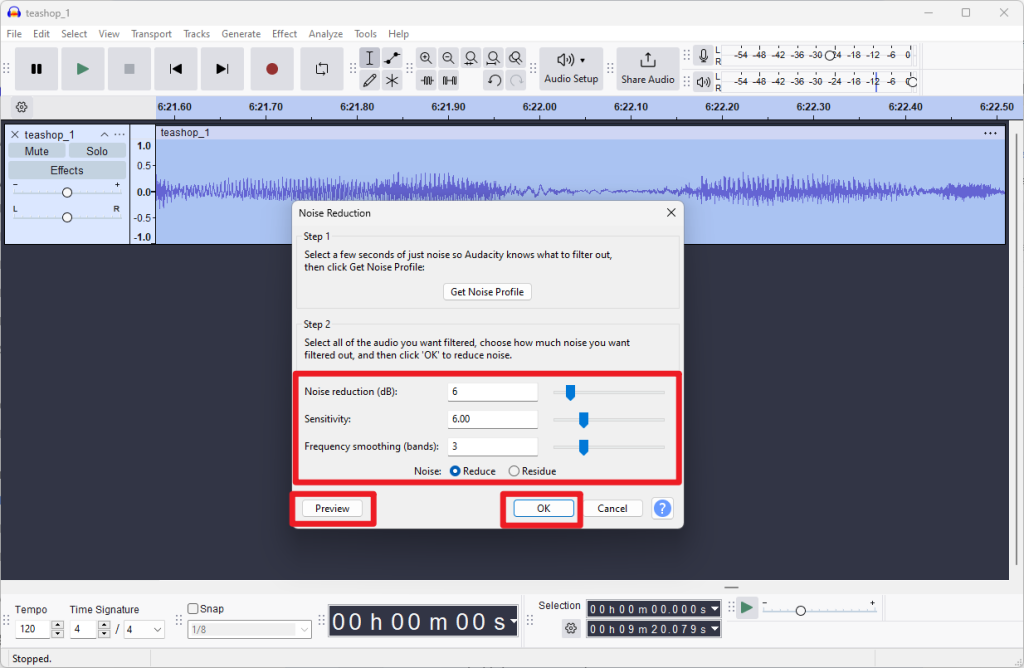
8. In the pop up window, adjust the parameters setting.
To preview the audio with the adjusted parameters, click the “Preview” button to listen. If the audio sounds satisfactory, click the “OK” button to apply the changes.
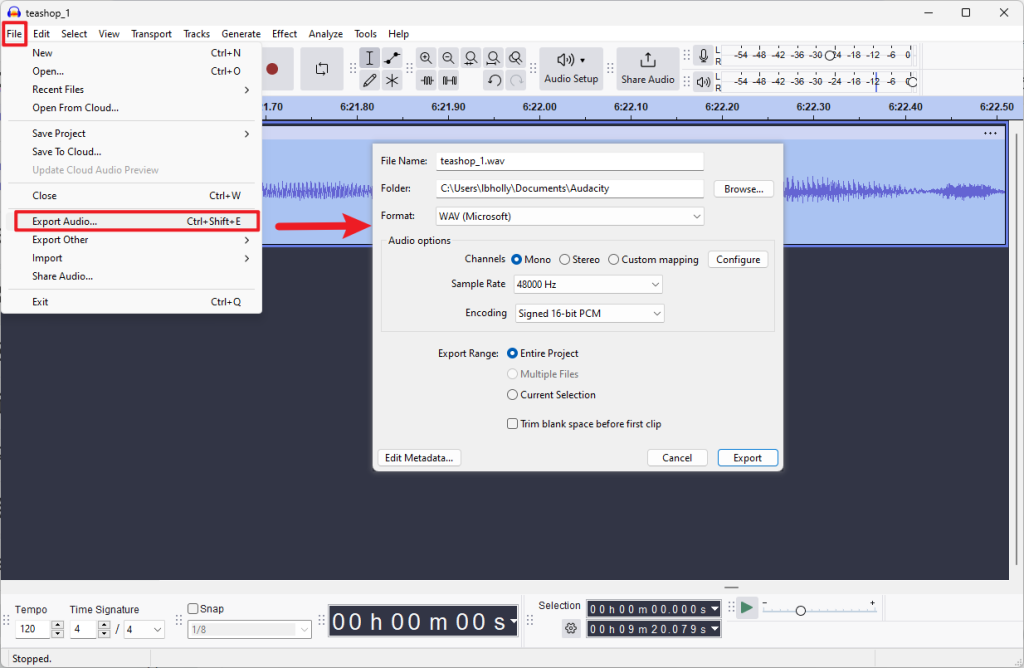
9. You may export the file by clicking “File” → “Export Audio…” .
Conclusion
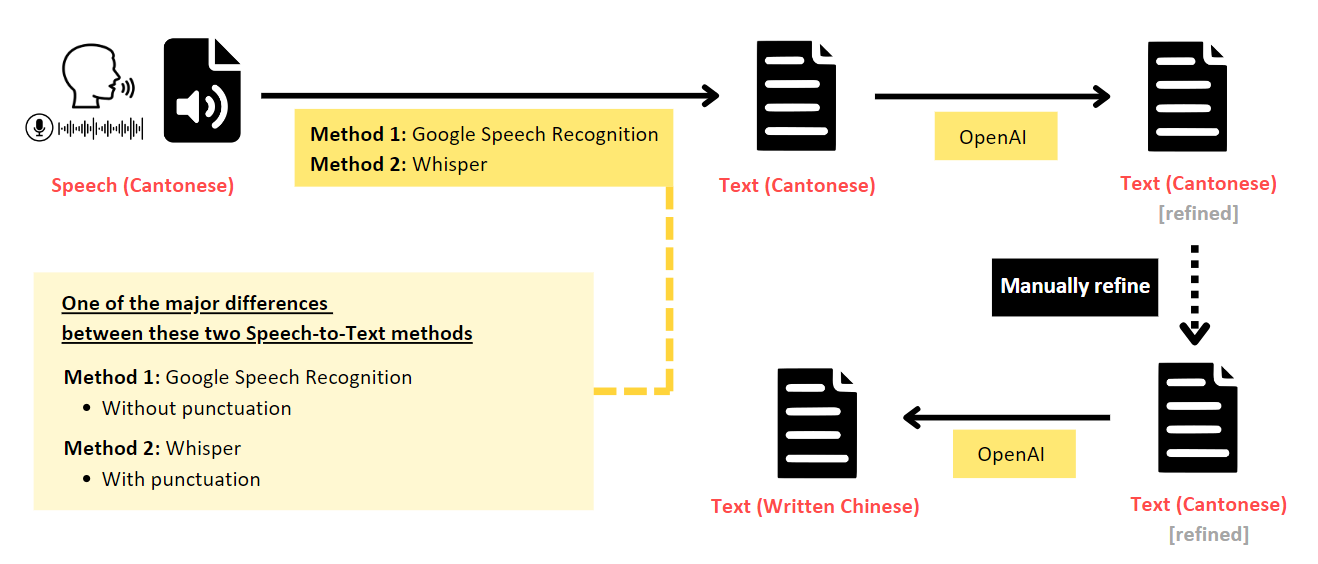
Using Audacity to reduce background noise in your audio recordings is a straightforward and simple process. By following the steps outlined in this article, you can quickly improve the clarity and quality of your audio files. In our next article, we’ll show you how to transcribe speech to text and provide code samples for you to speed up the process in batch, further enhancing your ability to work with audio data in your humanities research. Stay tuned!
References
Audacity. (2023, February 28). Noise reduction & removal. Audacity Support. https://support.audacityteam.org/repairing-audio/noise-reduction-removal
– By Holly Chan, Library
August 2, 2024
You may also be interested in…