Views: 760
Introduction
In humanities research, photographs can be essential primary sources that uncover key findings about the past, particularly when working with large collections of photographs. Fortunately, modern photographs that captured by digital camera often come with automatically embedded EXIF metadata, which includes information such as the camera settings, time and location where the photo was taken. When integrating EXIF data with Geographic Information Systems (GIS), researchers can quickly place the photos on the map, making the photographs and its derived findings more accessible, interactive and engaging for both academic and public audiences.
While many GIS tools are capable of mapping photos quickly according to their GPS coordinates data, this article will focus on how to use the software ArcGIS for this purpose as our university holds a subscription to this software.
Remarks: HKUST staff and students can use the software ArcGIS in the following locations:
- E-learning Classroom B at LG1 of the Library
- Computer Barn A, B, C in the campus
- Virtual Barn using your own devices
What is EXIF data?
EXIF stands for Exchangeable Image File Format, refers to the metadata embedded in an image file that describes how the file was created.
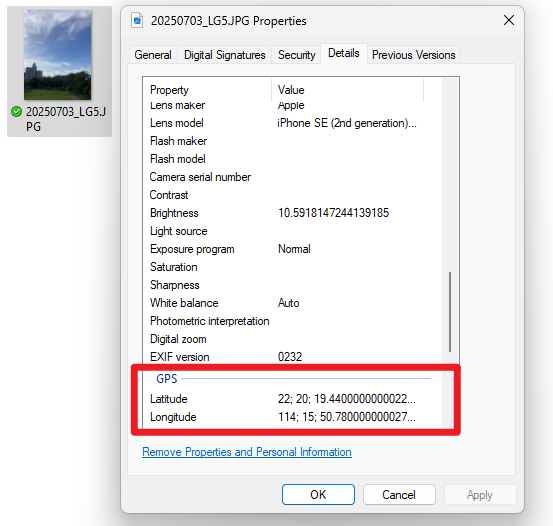
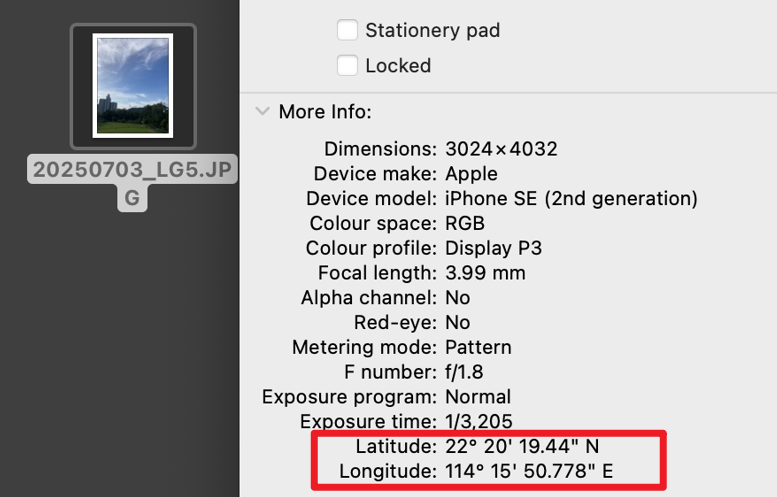
It contains details such as the type of device used for capturing the photo, camera settings, date and time, and, notably for GIS applications – the GPS coordinates: latitude and longitude.
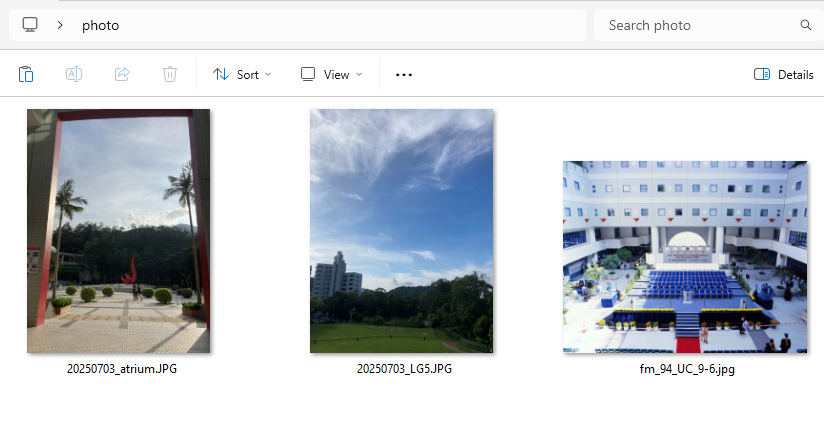
Sample photos
In the following demonstration, we will use these 3 photos as example.
For Photo 1 and 2, GPS details are included in their embedded metadata.
For Photo 3, no GPS data is attached because it was taken many years ago. Its date and time metadata in the EXIF fields are also inaccurate due to the long time since it was handled.
We will show you how differently they are processed in ArcGIS in the next section of this article.


https://digitalimages.hkust.edu.hk/gallery/index.php/nggallery/image/fm_94_uc_9-6?p=1843
Pin photos in ArcGIS
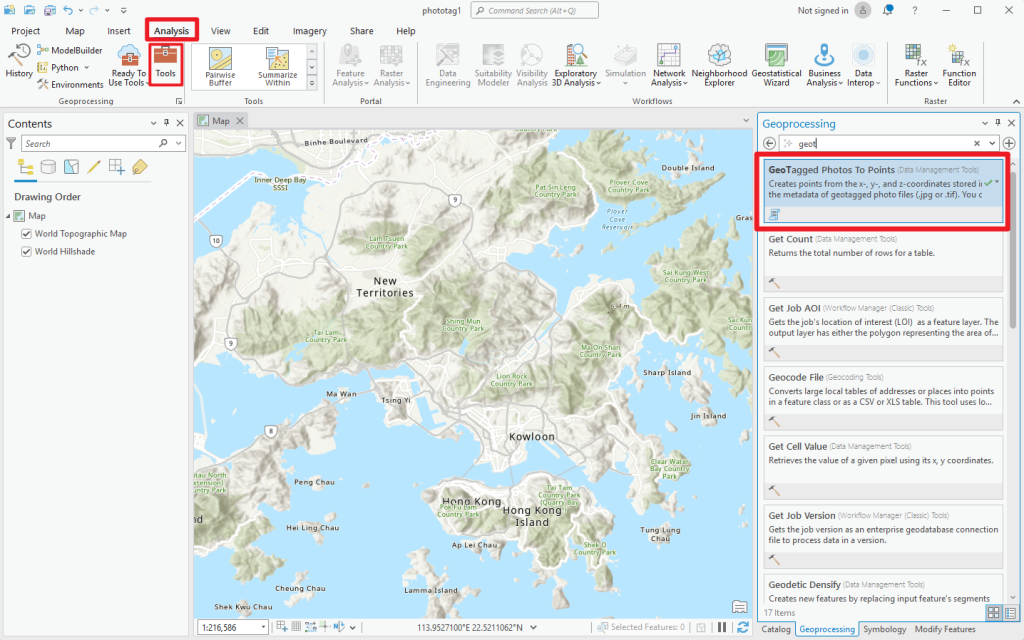
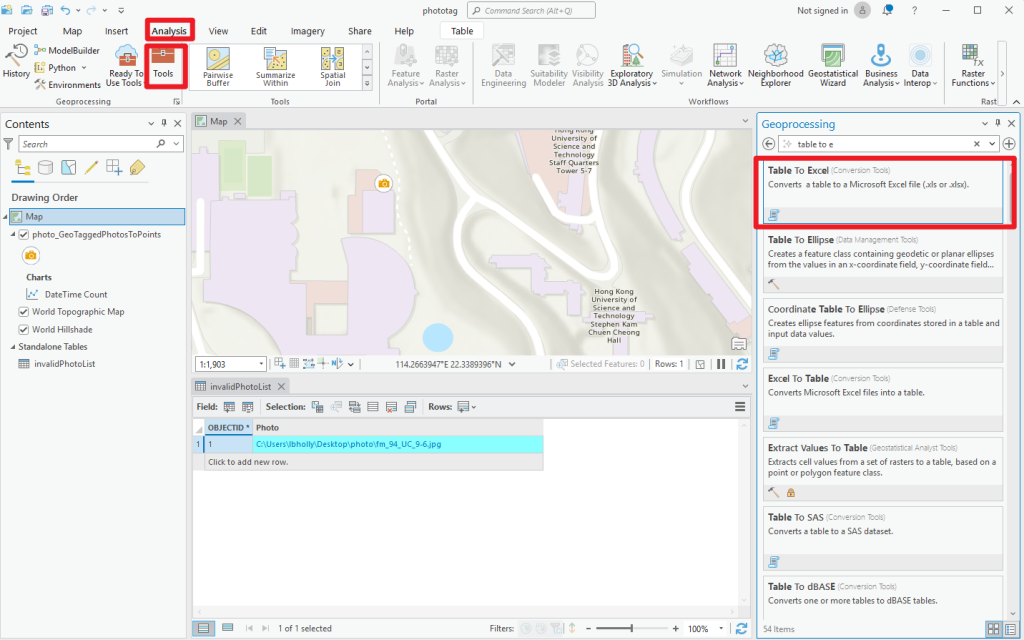
- Click “Analysis” in the top menu tab.
- Select “Tools” to search for geoprocessing tool.
- Search and select “GeoTagged Photos to Points“.


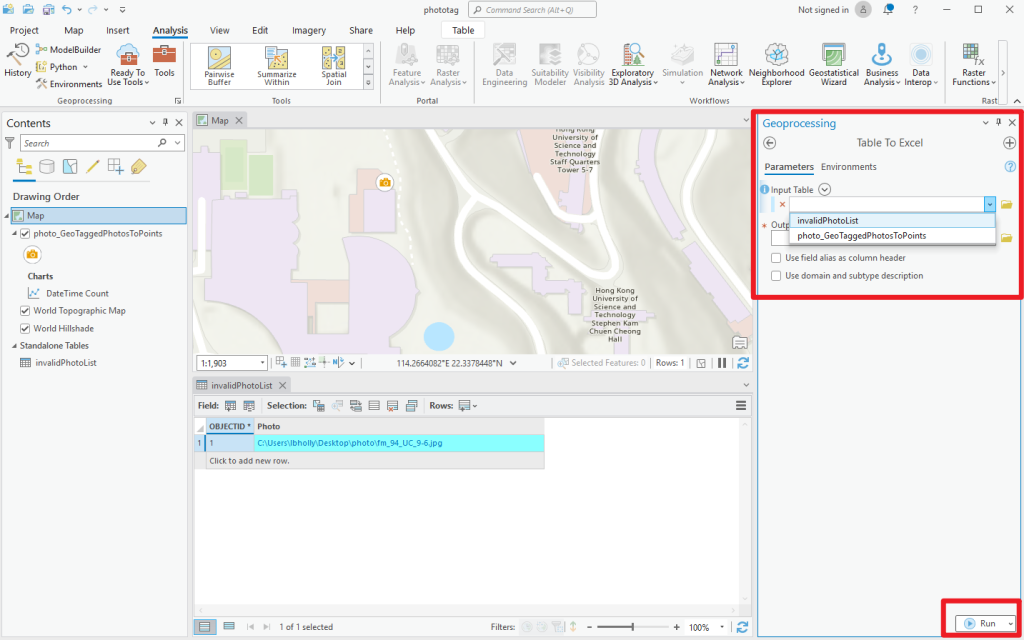
4. Input the parameters and then click “Run”.
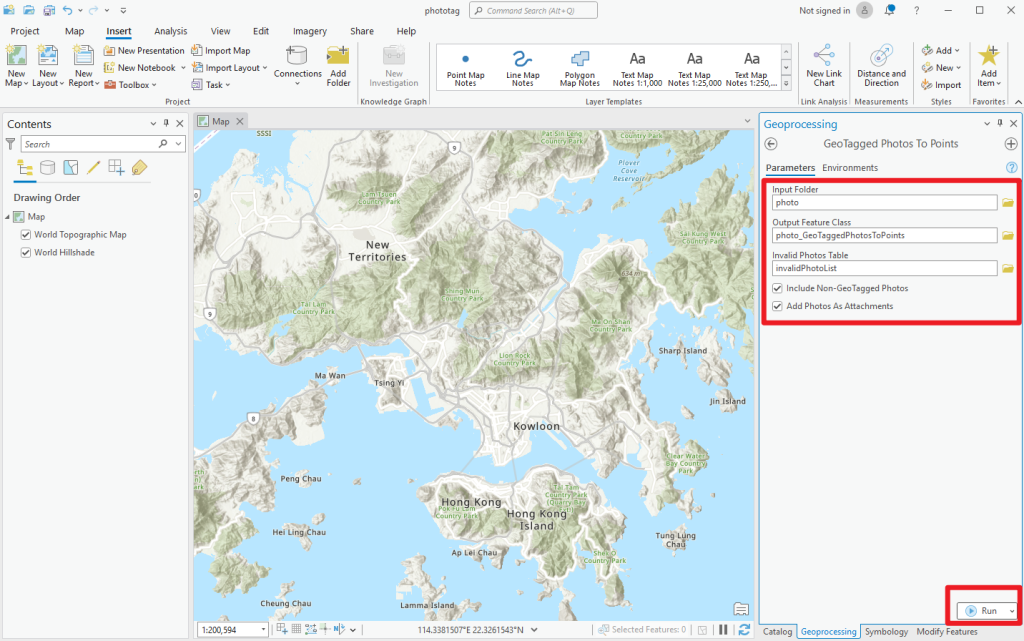
5. The photos with GPS coordinates data are now automatically pinned on the map. Done!
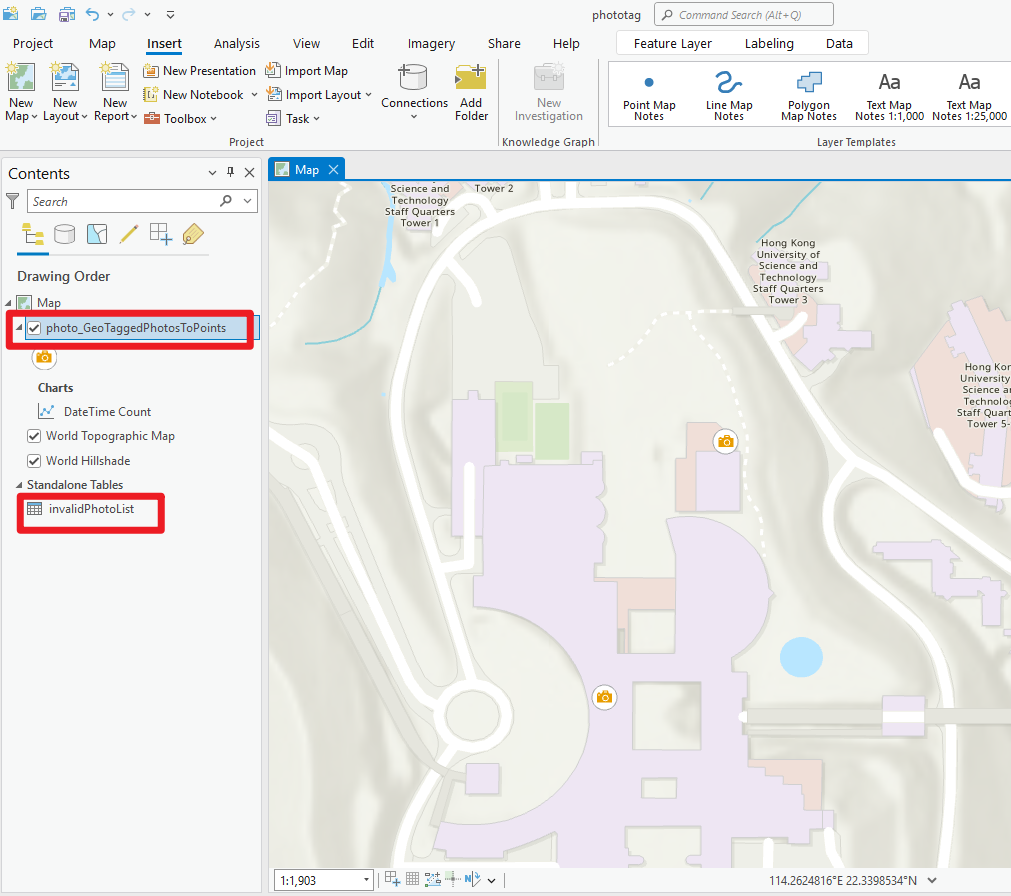
In this case, you can see only two points are pinned. Photo 3 (the old photo without coordinates data) is not shown because of its lack of embedded GPS data.
On the left panel, two new options appeared.
“photo_GeoTaggedPhotoToPoints”: Contains the information of all photos in the input folder.
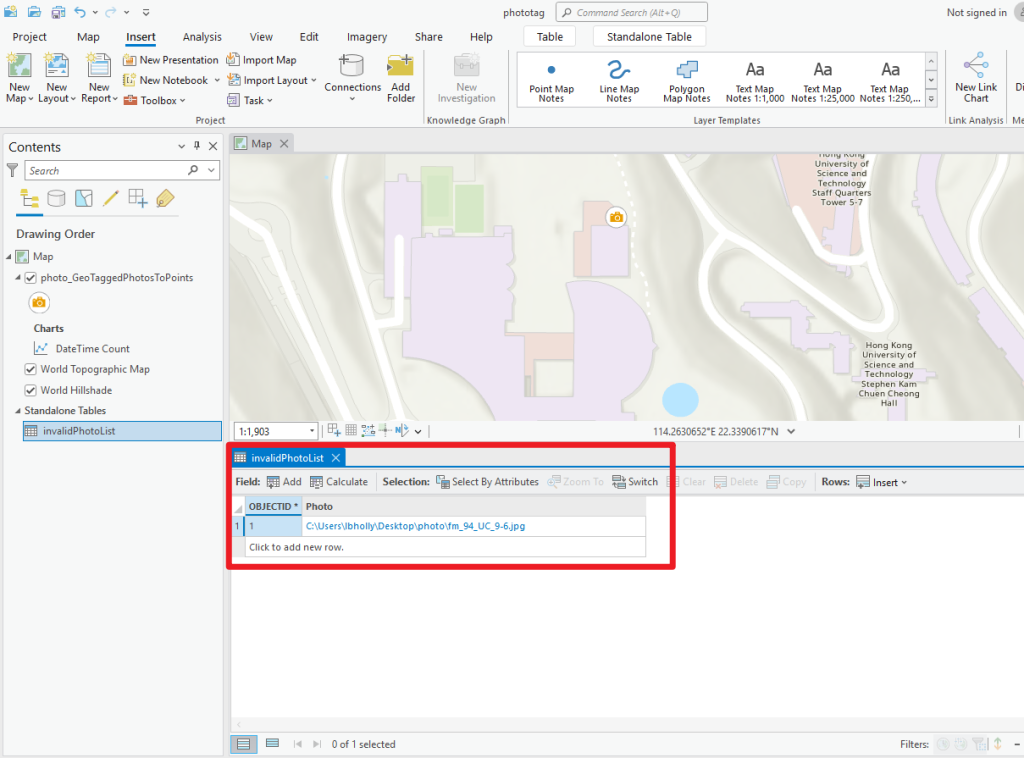
“invalidPhotoList”: A table that list those photos with invalid Exif metadata or empty or invalid coordinates.
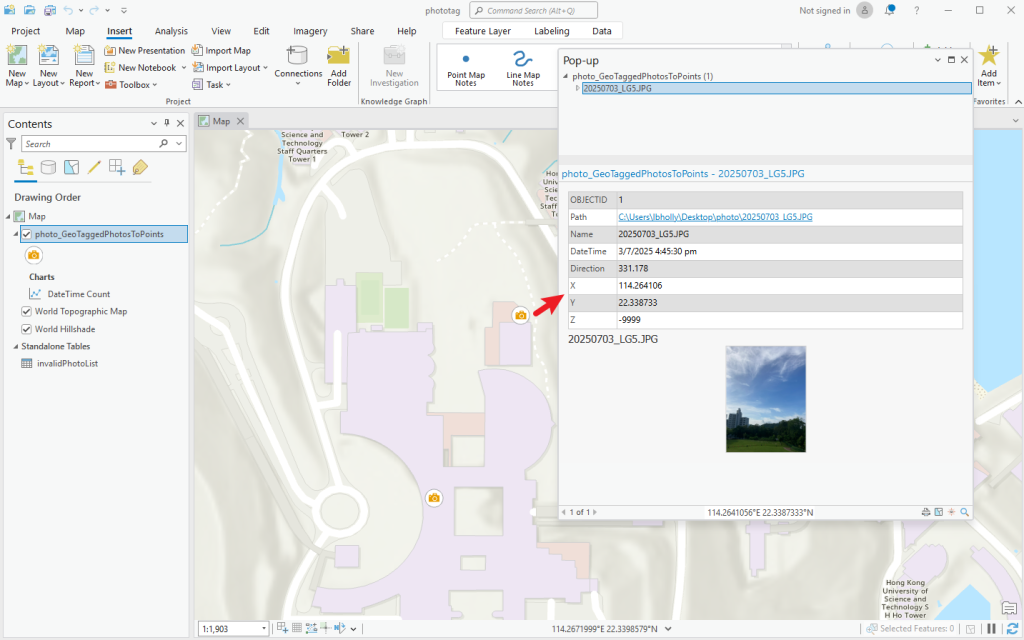
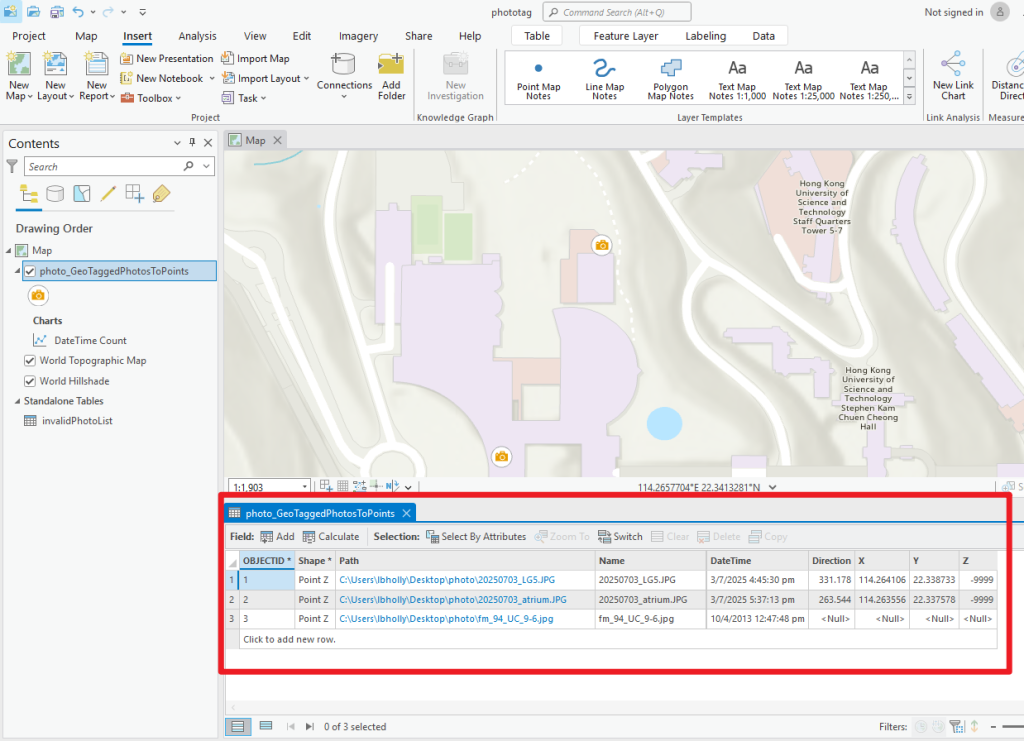
When you click on the pinned point, you can see the details and the corresponding photo of the point.

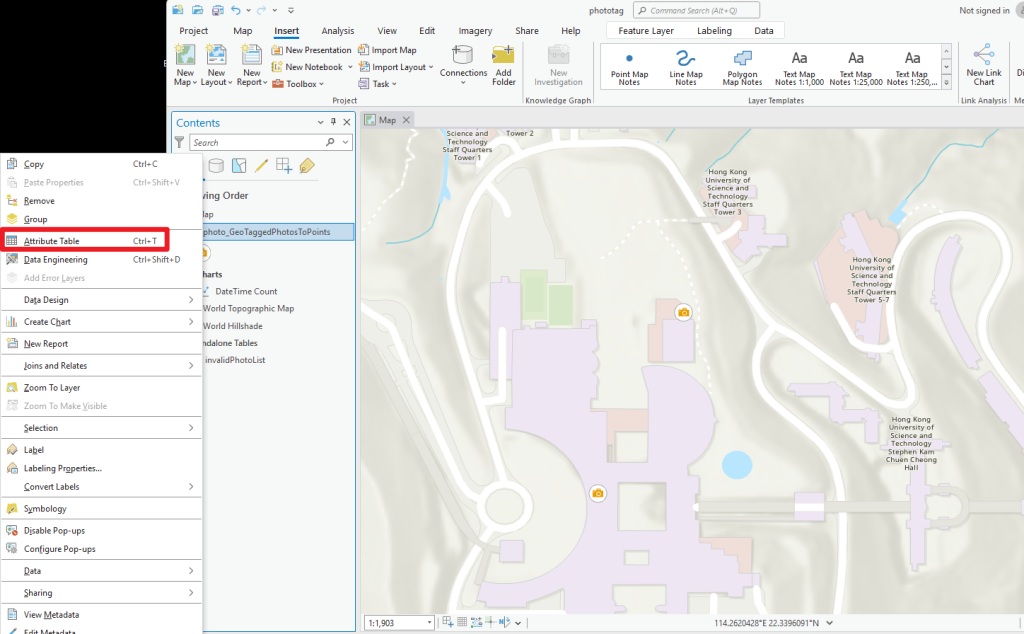
To view the details of each photo in the input folder, right click on the “photo_GeoTaggedPhotoToPoints” and select “Attribute Table“.
You can see that Photo 3 does not contain the x, y, z coordinates information in the Attribute Table.
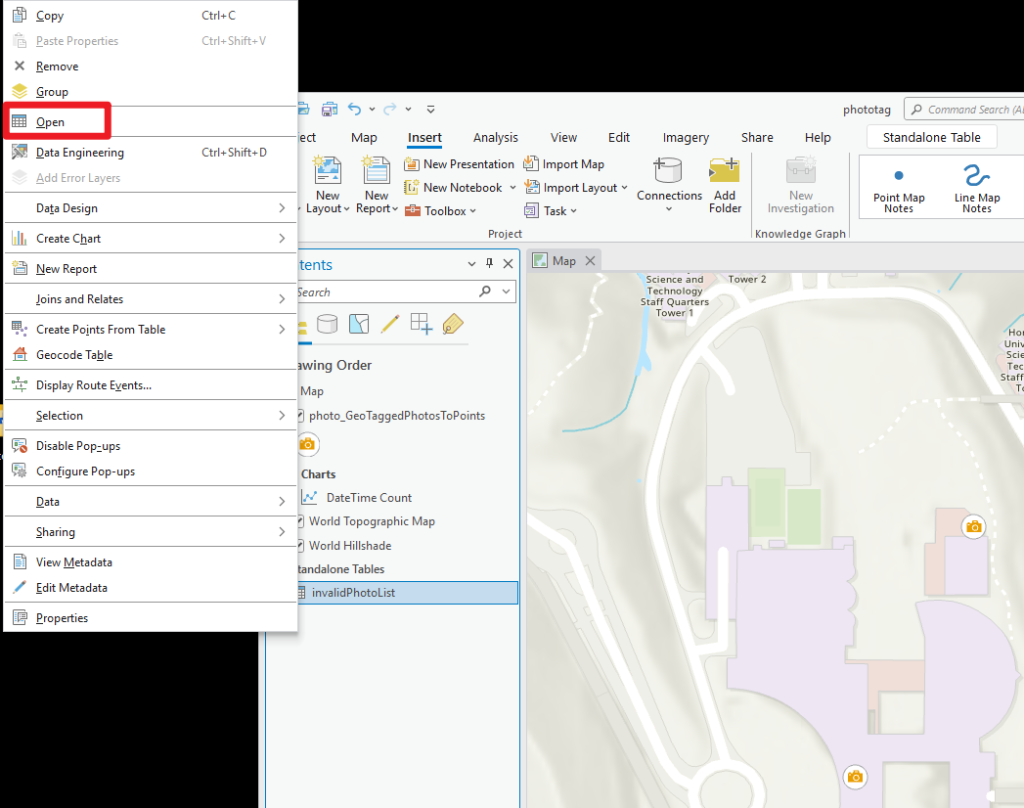
To quickly check which photos do not contain coordinates data, right click the “invalidPhotoList” and select “Open“. This will help you identify them for further data enhancement.
You can also use the Geoprocessing Tool “Table to Excel” to export the identified photos in Excel format.
Conclusion
You’ve now got the basics of using ArcGIS to effortlessly pin your photos with coordinate data right on the map — no more manual pinning! You can also filter out those photos without coordinates, which could be helpful when dealing with a large number of photos, letting you concentrate on filling the data gaps and enriching the details for those that are missing coordinate data. If you want to dive deeper, check out the ArcGIS guides or visit the website of CSDI’s Geospatial Lab. They occasionally organize free workshops and offer useful online resources. Happy exploring!
– By Holly Chan, Library
July 4, 2025
You may also be interested in…