Views: 7,159
In the previous article, you’ve learnt how to create a mirror material in Unreal Engine. In this article, our student assistant (SHEN Xiao Yuan) shares how to use blueprints in Unreal Engine to allow a third-person character to grab objects.
Introduction
Here’s a step-by-step tutorial on how to grab and move an object in Unreal Engine 5 using Blueprints.
Steps
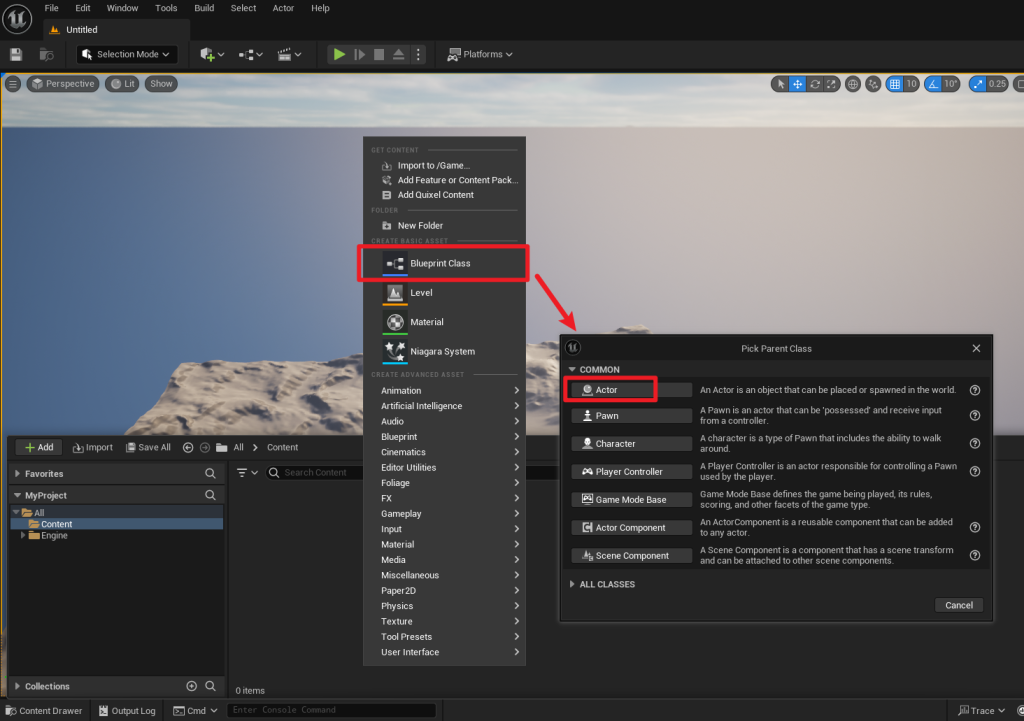
Step 1: Create a New Blueprint Class
- Open Unreal Engine 5 and create a new project or open an existing one.
- In the Content Browser, right-click and select Blueprint Class.
- Choose Actor as the parent class and name it (e.g., Teabag).


Step 2: Add a Static Mesh
- Open Teabag Blueprint.
- In the Components panel, click on Add Component and select Static Mesh.
- Choose a mesh (like a teabag) in the Details panel to represent your object.
- Add a Sphere Collision component to serve as the grabbing area and adjust its size to encompass the object.
- Compile and save your changes.

Step 3: Implement Grab Logic
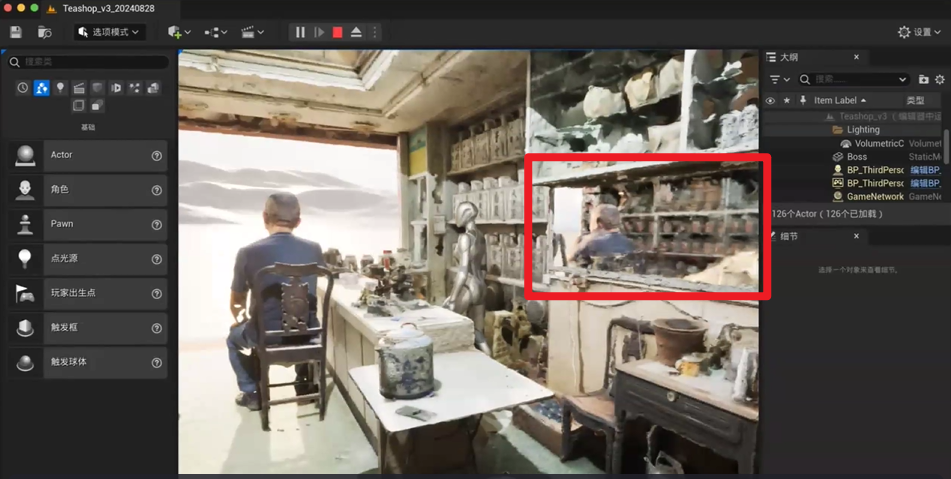
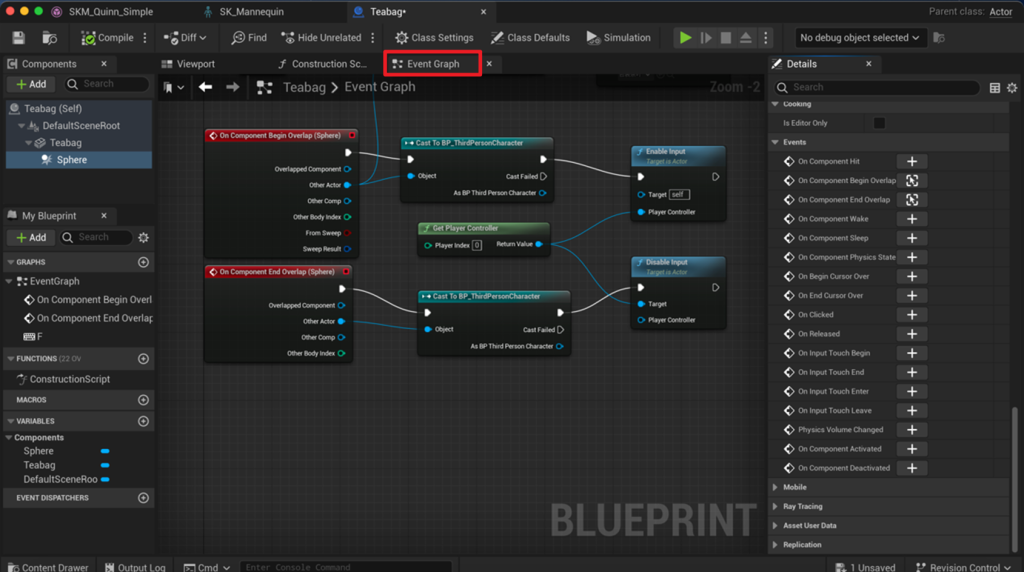
In the Event Graph of Sphere:
- Delete any existing nodes.
- Find both On Component Begin Overlap and On Component End Overlap events from the Details panel, click “+” to add them.
- Since the movement taker is ThirdPersonCharacter, drag a line from Sphere nodes and search for Cast To BP_ThirdPersonCharacter, then set up the nodes to allow input when there’s an overlap between the Sphere Collision and the character:
Step 4: Create Pickup Event
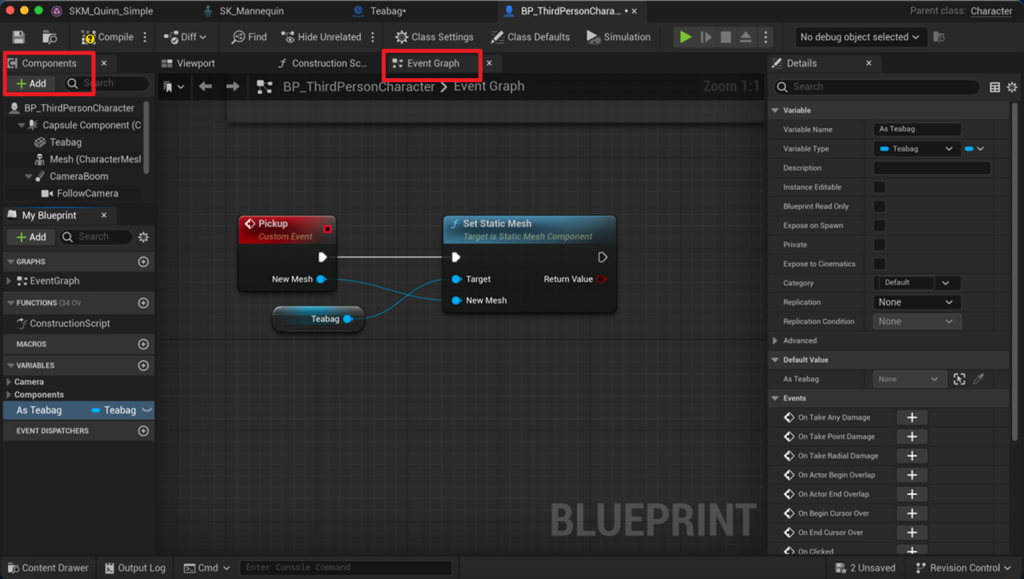
Open your player character Blueprint (e.g., BP_ThirdPersonCharacter).
- In the Components panel, click on Add Component and select Static Mesh, naming it (e.g., Teabag).
- In the Event Graph, right-click to create a Custom Event (e.g., Pickup).
- Drag a line from the event, search for Set Static Mesh, and connect the New Mesh nodes.
- Drag the Static Mesh from the Components panel to the Event Graph, assigning it as the Target of Set Static Mesh.
Step 5: Create Input Actions
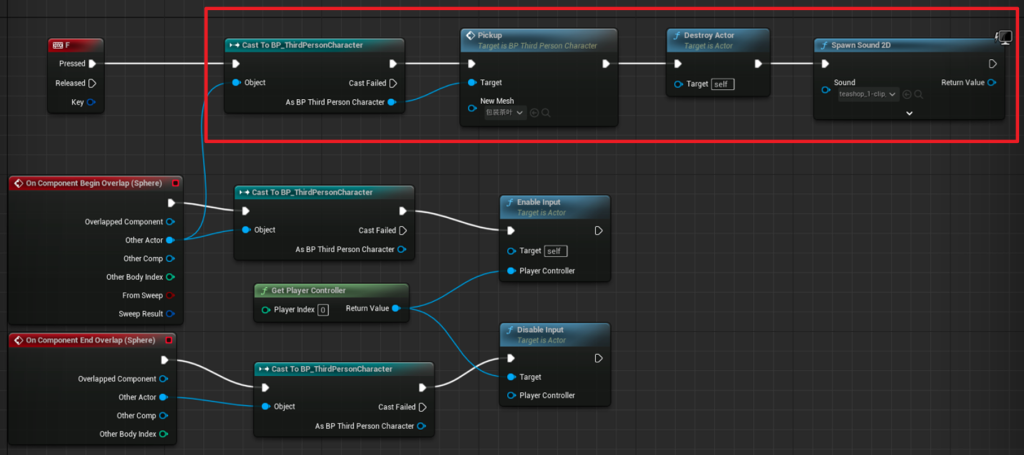
Go back to the Teabag Blueprint, under the Event Graph:
- Right-click to search for a key event (e.g., F for keyboard input).
- Link it to the Cast To BP_ThirdPersonCharacter node, add the Pickup Event, and set up nodes to Destroy Actor and play a sound upon picking up, the nodes are showed below:
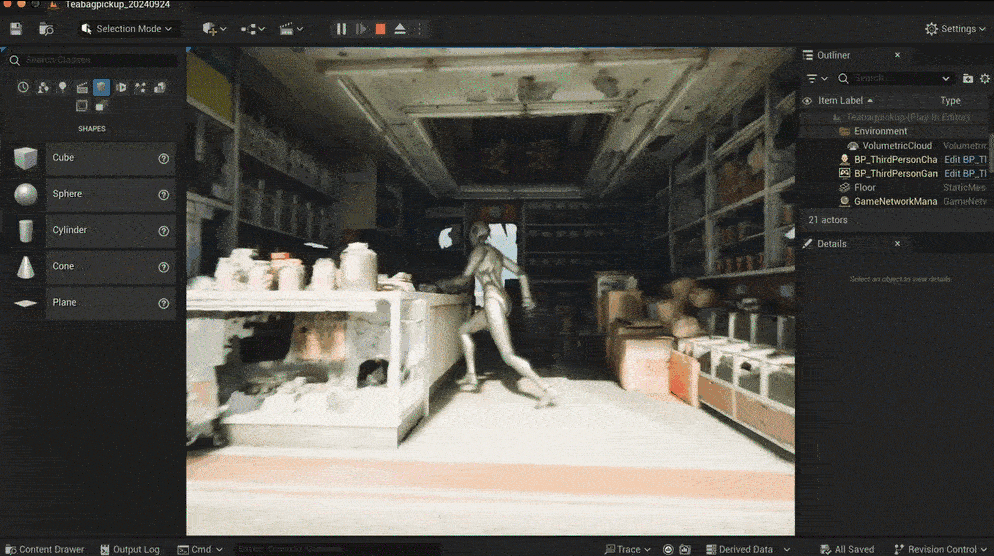
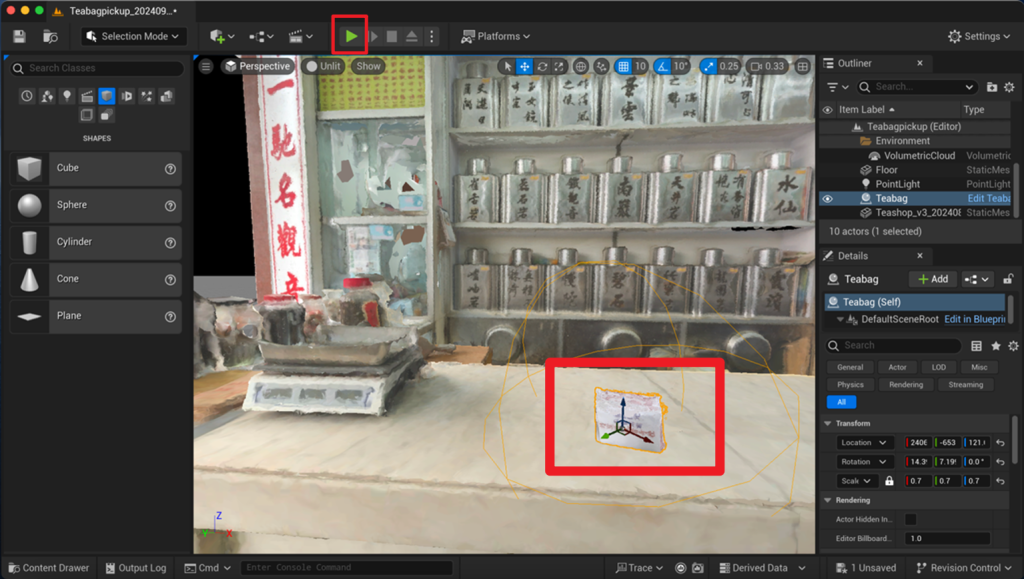
Step 6: Test Your Setup
- Place your grabbable object (e.g., Teabag) in the level.
- Play the game, approach the object, and press the designated key to grab and move it around.
Step 7: Fine-Tuning
- Adjust the size of the Sphere Collision for better grabbing.
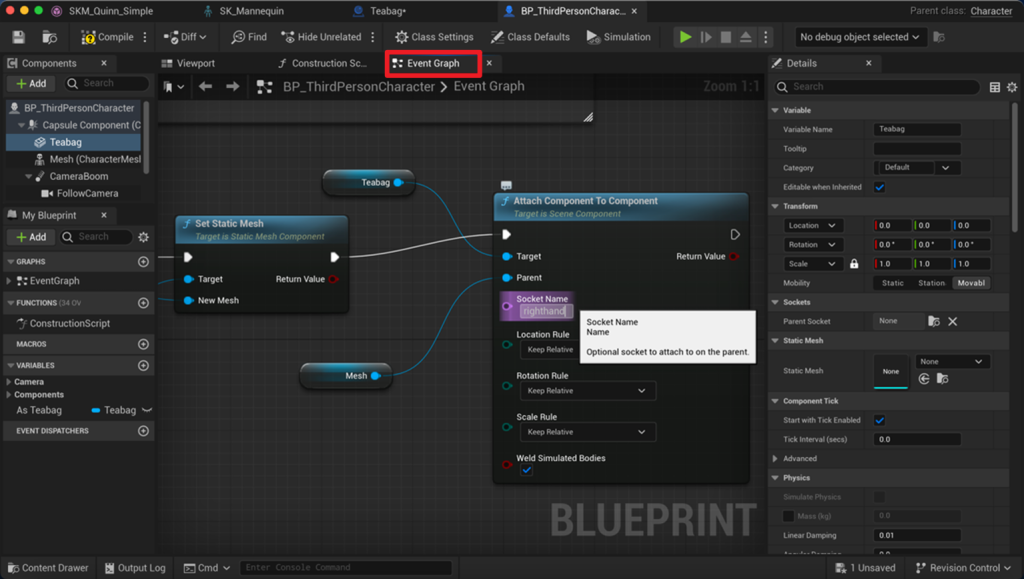
- If you want to attach the object to a specific point (like a hand), open the player character Blueprint (e.g., BP_ThirdPersonCharacter):
- In the Event Graph, drag from Set Static Mesh, search for Attach Component to Component, and specify the Socket Name (e.g., righthand).
- Drag both your static mesh and the Mesh into the Event Graph, setting the static mesh as Target and Mesh as Parent.
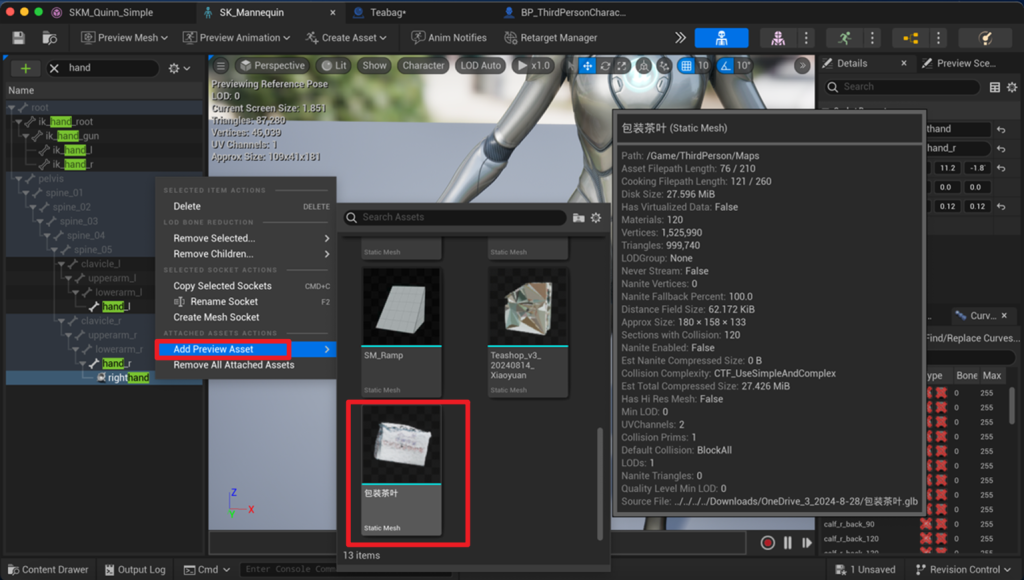
Step 8: Creating a Socket
- Double-click the Skeletal Mesh Asset under the Details panel of the Mesh.
- Click the SK_Mannequin button at the top, find your desired attachment point (e.g., hand).
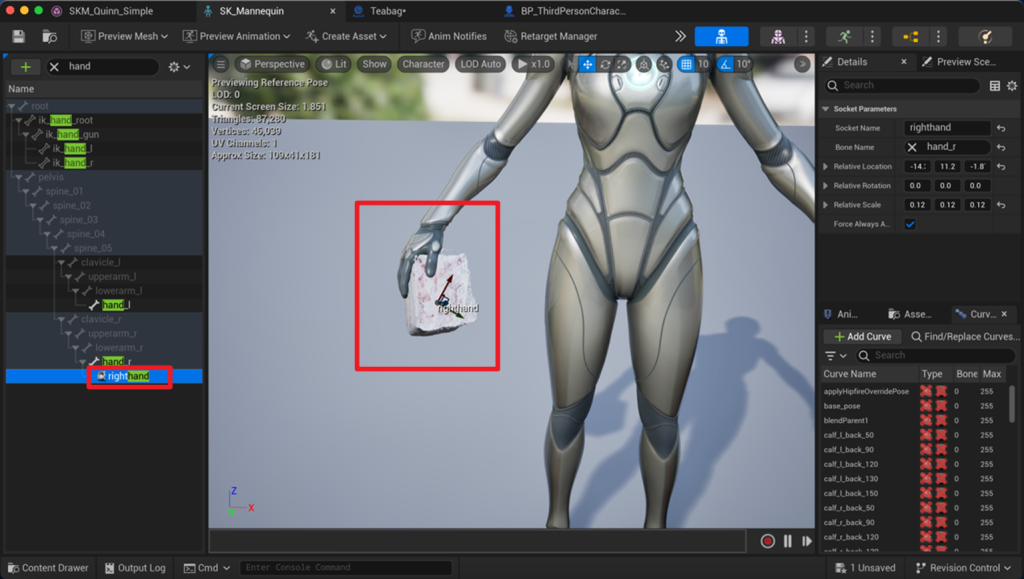
- Right-click to Add Socket, naming it the same as the one used in Attach Component to Component (e.g., righthand).
- Right-click on the new socket, choose Add Preview Asset, find your grabbable object, and adjust its size and position as needed.
- If the socket isn’t visible, click Show All Sockets.
Done!
Conclusion
You now have a basic setup for grabbing and moving objects in Unreal Engine 5 using Blueprints. You can extend this functionality with more features like sound effects, animations, or advanced physics interactions as you become more comfortable with Unreal Engine. Happy developing!
– By SHEN Xiao Yuan (student from MPhil in Chemical and Biological Engineering)
October 3, 2024
You may also be interested in…