Views: 10,849
Introduction
In our previous article, we showed you one of the methods to reduce background noise from audio files. Building upon that foundation, this article will show you how to transcribe speech to text and provide code samples for you to speed up the process in batch, further enhancing your ability to work with audio data in your humanities research.
While the examples in this article will use Cantonese speech, the same techniques can be applied to transcribe speech in other languages.
Code
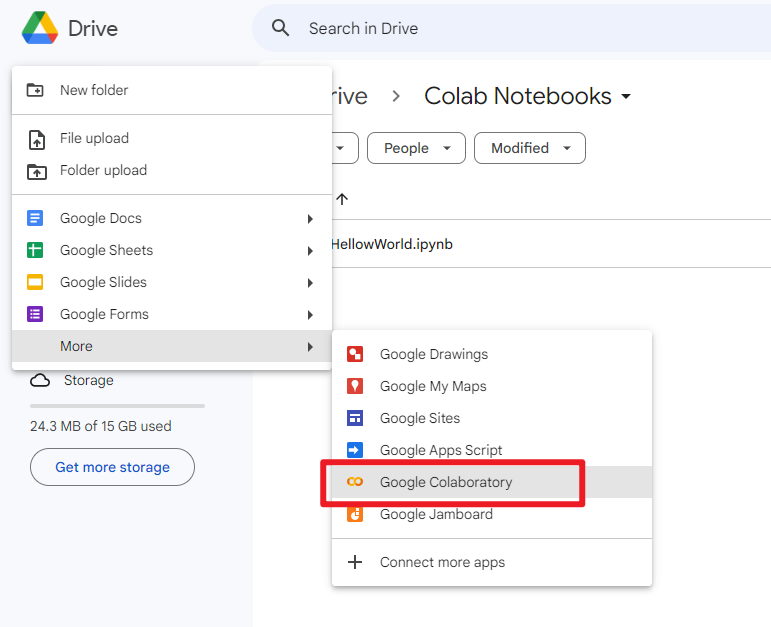
You can find all of the code shown below in this Jupyter Notebook (.ipynb file). If this is your first time using Jupyter Notebook, please refer to our previous tutorial article “How to open .ipynb file (Jupyter Notebook)” for reference.
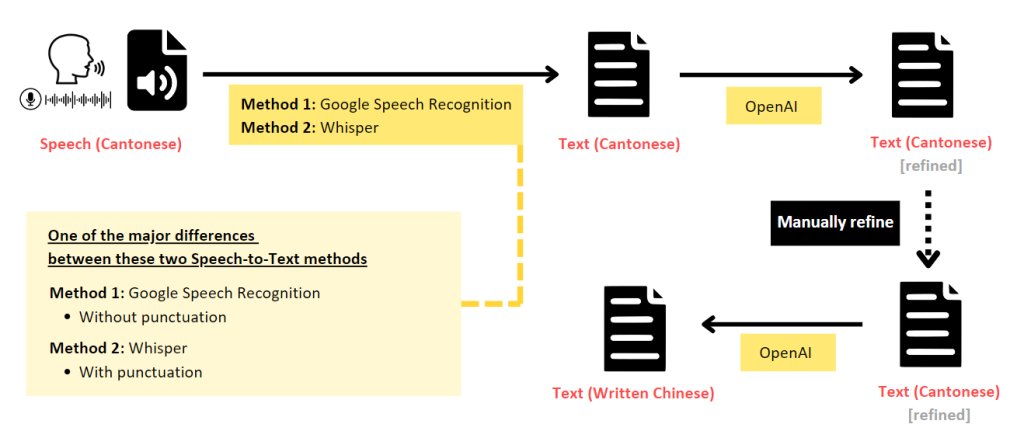
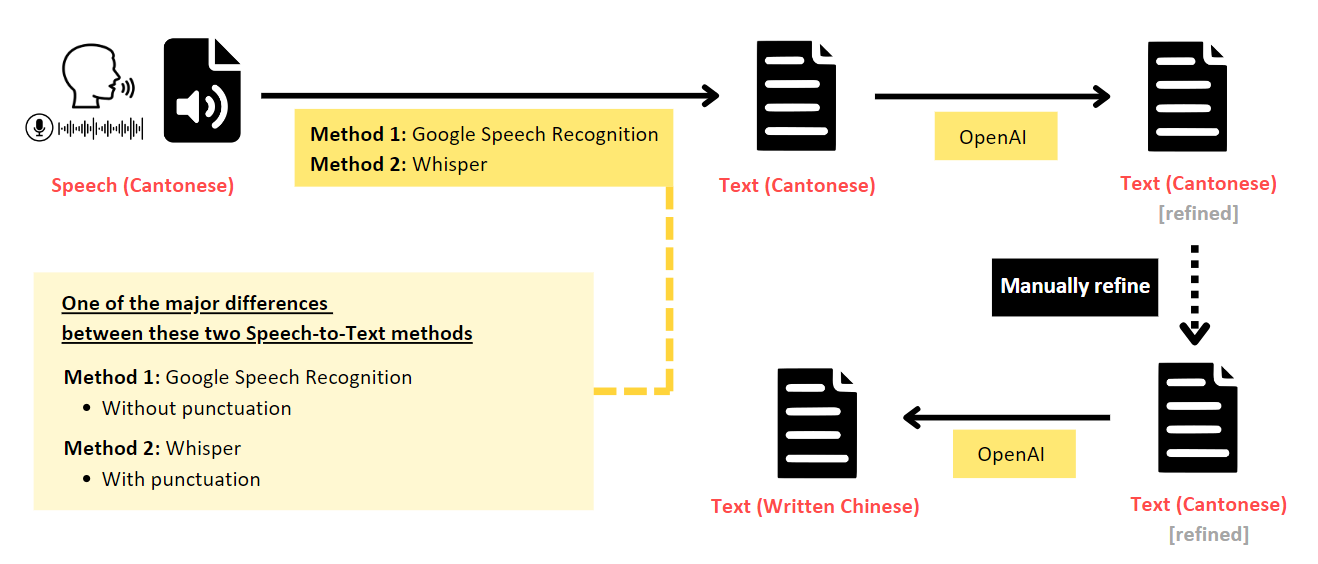
Below is one of the recommended overall workflow:
Install and import necessary packages
!pip install soundfile
!pip install pydub
!pip install SpeechRecognition
!pip install openai --upgrade

import os
import csv
import wave
import soundfile
import requests
import pandas as pd
from datetime import timedelta
from pydub import AudioSegment
import speech_recognition as sr
from transformers import pipeline
from openai import AzureOpenAI
1. Speech (Cantonese) to Text (Spoken Cantonese)
The first step is to transcribe the speech directly into text that captures the spoken language. This can be achieved using Automated Speech Recognition (ASR) models.
Method 1: using Google Speech Recognition
The code below uses the speech_recognition library to transcribe the Cantonese audio file into spoken Cantonese text. The recognize_google() function uses Google Speech Recognition to perform this task. For Cantonese, the language code “yue-HK” is used. If you need to work with other languages, please refer to the language code available here: https://cloud.google.com/text-to-speech/docs/voices
def stt_Cantonese(audio_file):

    # Write the audio data back to the same file, using the original sample rate and a 16-bit PCM encoding to avoid the ValueError: Audio file could not be read as PCM WAV, AIFF/AIFF-C, or Native FLAC; check if file is corrupted or in another format
    data, samplerate = soundfile.read(audio_file)
    soundfile.write(audio_file, data, samplerate, subtype='PCM_16')

    r = sr.Recognizer()

    with sr.AudioFile(audio_file) as source:
        audio = r.record(source)

    try:
        text = r.recognize_google(audio, language="yue-HK") # yue-HK = Cantonese
        return text

    except sr.UnknownValueError:
        print("Google Speech Recognition could not understand audio")
        return None
    except sr.RequestError as e:
        print("Could not request results from Google Speech Recognition service; {0}".format(e))
        return None
As you can see from the screenshot above, the speech-to-text output from Google Speech Recognition does not include punctuation. To add punctuation to the transcribed text, you could make use of OpenAI.
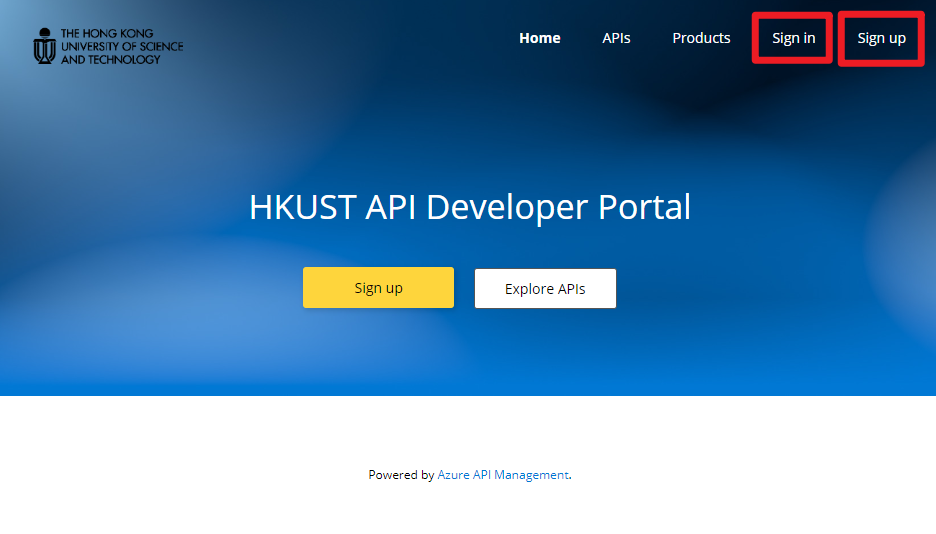
All HKUST staff and students have monthly free credits for using Azure OpenAI service. Please refer to this article “How to use HKUST Azure OpenAI API key with Python (with sample code and use case examples)” to learn how you can obtain your Azure OpenAI API key.
# Parameters
client = AzureOpenAI(
  azure_endpoint = "https://hkust.azure-api.net",
  api_version = "2024-06-01",
  api_key = "<your_azure_openai_api_key>" # See here to see how to get your HKUST Azure OpenAI API key: https://digitalhumanities.hkust.edu.hk/tutorials/how-to-use-hkust-azure-openai-api-key-with-python-with-sample-code-and-use-case-examples/
)

def refineCantonese(message):
    try:
        response = client.chat.completions.create(
            model = 'gpt-4o',
            temperature = 1,
            messages = [
                {"role": "system", "content": """
                                            You are an expert in Cantonese. Please perform the following two steps and return the revised text.
                                            1. Correct potential inaccuracies in the Cantonese text in Hong Kong style. For example, in Hong Kong, text such as '噉', should be written as '咁'.
                                            2. Add punctuation to the text.
                                            """},
                {"role": "user", "content": message}
            ]
        )
        return response.choices[0].message.content
    except:
        return None
Method 2: using Whisper model
https://huggingface.co/alvanlii/whisper-small-cantonese
The code below uses the Hugging Face Transformers library to load a pre-trained model for translating Cantonese speech to written Chinese text. However, it takes a longer time to process the task than that of Method 1 (see the table below for the comparison).
MODEL_NAME = "alvanlii/whisper-small-cantonese"
lang = "zh"
device = "cpu"  # or "cuda" if you have a GPU
pipe = pipeline(
    task="automatic-speech-recognition",
    model=MODEL_NAME,
    chunk_length_s=30,
    device=device,
)
pipe.model.config.forced_decoder_ids = pipe.tokenizer.get_decoder_prompt_ids(language=lang, task="transcribe")
Comparison between Method 1 and 2
| Model | Recognized text from a 30 seconds audio file | Processing time (in CPU computer) |
|---|---|---|
| Verified text (by manual transcription) | 我姓劉嘅,咁我就喺呢條街、喺九龍城區出世嘅。我58歲啦,咁我就做咗、喺呢度都係58年。以前喺鄉下我阿爺都係做茶,嚟到就都係做茶囉。我哋開咗70年,初初就喺對面嘅,咁喺對面搬過嚟呢度。咁以前我哋呢度就前舖後居嘅,我哋呢度就瞓七個人,後欄嗰度呢咁就間咗兩間房,咁我哋收工呢就喺呢度行啲版呀、茶葉箱呀就喺度瞓。 | NA |
| Google Speech Recognition | 我姓劉嘅咁我就喺呢條街喺九龍城區出世嘅我58歲呀咁我就做咗喺呢度都係58年以前喺鄉下婆爺呢度就都係做茶囉70年初初就喺對面嘅咁喺對面呢咁以前我哋呢度就全舖後居嘅我哋呢度就瞓七個人後欄嗰度呢咁佢間咗兩間房㗎咁我哋收工呢就喺呢度行啲版呀喺度瞓 | 17.1s |
| Use OpenAI to refine and add punctuation to the output of Google Speech Recognition above | 我姓劉嘅,咁我就喺呢條街,喺九龍城區出世嘅。我58歲呀,咁我就做咗喺呢度,都係58年。以前喺鄉下婆爺呢度,就都係做茶囉。70年初初就喺對面嘅,咁喺對面呢。咁以前我哋呢度,就全舖後居嘅。我哋呢度就瞓七個人,後欄嗰度呢,咁佢間咗兩間房㗎。咁我哋收工呢,就喺呢度行啲版呀,喺度瞓。 | 6.1s |
| Whisper Small Cantonese (HuggingFace: alvanlii/whisper-small-cantonese) | 我姓劉嘅,噉我就喺呢條街喺九城區出世嘅,我五十八歲呀,噉我就做咗喺呢度都係五十八年喇以前喇鄉下太爺都喇到,你都係做茶囉,我哋開開七十年,初初就喺對面嘅,咁喺對面呢通過喺呢度嘅?噉以前我喺呢度就前鋪後居嘅,我哋呢度就瞓七個人,後欄嗰度呢噉佢間咗兩間房嘅,噉我哋收工呢就喺呢度行啲板呀,兩個人相個班喺度瞓覺 | 2m 11.9s |
| Use OpenAI to refine the output of Whisper Small Cantonese above | 我姓劉嘅,咁我就喺呢條街,九城區出世嘅。我五十八歲呀,咁我就喺呢度住咗五十八年喇。以前啊,鄉下太爺都嚟過,你都係做茶嘅。我哋開咗七十年,初初就喺對面嘅。咁,對面呢,噉然後通過嚟到呢度㗎。以前我哋就係前鋪後居嘅,我哋呢度瞓七個人。後欄嗰度呢,咁佢間咗兩間房嘅。咁我哋收工呢,就喺呢度行啲板呀,兩個人換番啲喺度瞓覺。 | 3.7s |
2. Speech (Cantonese) to Text (Written Chinese) using Whisper V3 model
https://huggingface.co/openai/whisper-large-v3
We can also use the OpenAI’s Whisper V3 model to transcribe Cantonese speech to Written Chinese text directly.
HF_API_URL = "https://api-inference.huggingface.co/models/openai/whisper-large-v3"
headers = {"Authorization": "Bearer <your_hugging_face_api_key>"} #You may get your Hugging Face api key here: https://huggingface.co/settings/tokens

def stt_WrittenChi(audio_file):
    with open(audio_file, "rb") as f:
        data = f.read()
    response = requests.post(HF_API_URL, headers=headers, data=data)
    return response.json()["text"]
3. Text (Spoken Cantonese) to Text (Written Chinese) using OpenAI
Since the existing ASR models are not fully accurate, we would recommend improve the Cantonese text output first, and then use that refined Cantonese as the basis for converting it to written Chinese. The code below uses OpenAI to translate the spoken Cantonese text to written Chinese text. You can adjust the prompt message according to your needs.
# Parameters
client = AzureOpenAI(
  azure_endpoint = "https://hkust.azure-api.net",
  api_version = "2024-06-01",
  api_key = "<your_azure_openai_api_key>" # See here to see how to get your HKUST Azure OpenAI API key: https://digitalhumanities.hkust.edu.hk/tutorials/how-to-use-hkust-azure-openai-api-key-with-python-with-sample-code-and-use-case-examples/
)

def Canto_to_Chi_OpenAI(message):
    try:
        response = client.chat.completions.create(
            model = 'gpt-4o',
            temperature = 1,
            messages = [
                {"role": "system", "content": """
                                            Translate the following text from spoken Cantonese text to written language of traditional Chinese text.
                                            """},
                {"role": "user", "content": message}
            ]
        )
        return response.choices[0].message.content
    except:
        return None
4. Summarize using OpenAI
To further enhance your research capabilities, you can generate summaries of the transcribed speech or text. This can be particularly useful when dealing with long passages or multiple documents – the summary can give you the key points in a nutshell. You may adjust the prompt message and add more criteria, such as keep the response output within a certain amount of word limit.
# Parameters
client = AzureOpenAI(
  azure_endpoint = "https://hkust.azure-api.net",
  api_version = "2024-06-01",
  api_key = "<your_azure_openai_api_key>" # See here to see how to get your HKUST Azure OpenAI API key: https://digitalhumanities.hkust.edu.hk/tutorials/how-to-use-hkust-azure-openai-api-key-with-python-with-sample-code-and-use-case-examples/
)

def summarize(message):
    try:
        response = client.chat.completions.create(
            model = 'gpt-4o',
            temperature = 1,
            messages = [
                {"role": "system", "content": """
                                            You are a journalist. Summarize the following text in traditional Chinese in a concise manner:
                                            """},
                {"role": "user", "content": message}
            ]
        )
        return response.choices[0].message.content
    except:
        return None
5. Batch processing and export to CSV
The code below allows you to process a batch of audio files in the WAV format and export the results (filename, duration, and Cantonese text) to a CSV file. Simply place all your WAV audio files in the same directory in this Jupyter Notebook, and run the code.
# Set the path to the directory containing the WAV files
path = '.' # current folder together with this ipynb file

# Create an empty list to store the data
data = []

# Loop through all files in the directory
for filename in os.listdir(path):
    if filename.endswith('.wav'):
        # Load the WAV file
        audio = AudioSegment.from_wav(os.path.join(path, filename))

        # Get the duration of the audio file
        duration = int(audio.duration_seconds)
        duration = str(timedelta(seconds=duration))

        filename_str = str(filename)

        # Speech (Cantonese) to Text (Spoken Cantonese)
        cantonese_text = stt_Cantonese(filename)

        if cantonese_text is not None:
            # Add punctuation and refine the Spoken Cantonese Text
            cantonese_text = refineCantonese(cantonese_text)

        # Add the data to the list
        data.append({
            'filename': filename,
            'duration': duration,
            'cantonese_text': cantonese_text,
        })

# DataFrame
df = pd.DataFrame(data)

# Save to a CSV file
df.to_csv('output_CantoneseText.csv', index=False, encoding='utf-8')
print("Exported in a csv file.")
Then, manually check the Cantonese text and refine. Afterward, perform Canto_to_Chi_OpenAI and summarize tasks as follows.
# Import the refined Cantonese text
df_refined = pd.read_csv('output_CantoneseText.csv', encoding='utf-8')

# Add two new columns
df_refined['writtenChi_text'] = df_refined['cantonese_text_refined'].apply(Canto_to_Chi_OpenAI)
df_refined['summary'] = df_refined['cantonese_text_refined'].apply(summarize)

# Save to a CSV file
df_refined.to_csv('output_CantoneseText_ChiWrittenText.csv', index=False, encoding='utf-8')
print("Exported in a csv file.")
Conclusion
By automating the process of transcribing speech to text and organizing the results in a structured CSV format, researchers can save more time and effort to focus on the analysis and interpretation of the data. Hope this sharing has provided a useful solution to enhance your humanities research projects that involving audio data.
– By Holly Chan, Library
August 14, 2024

